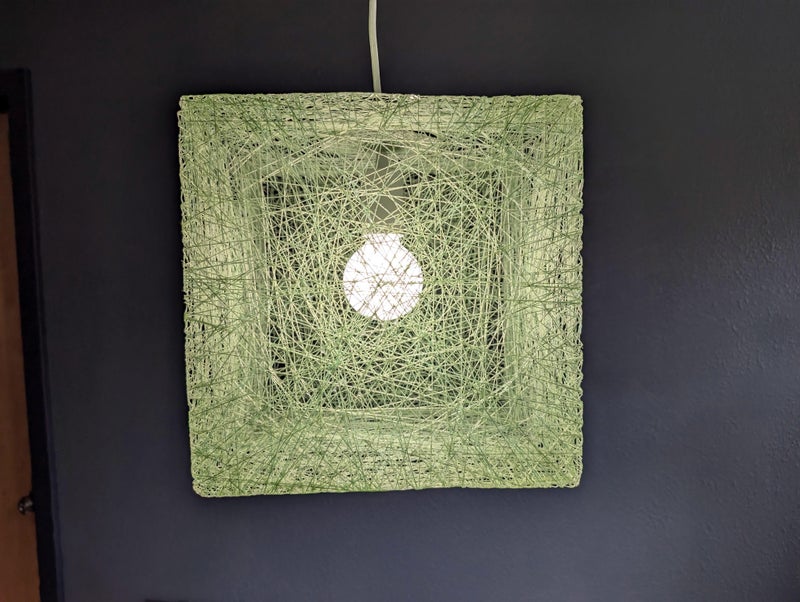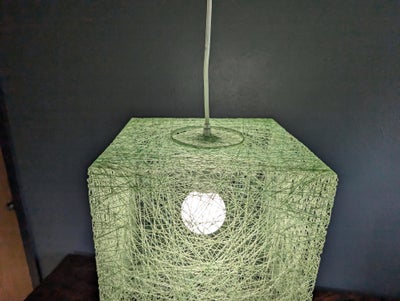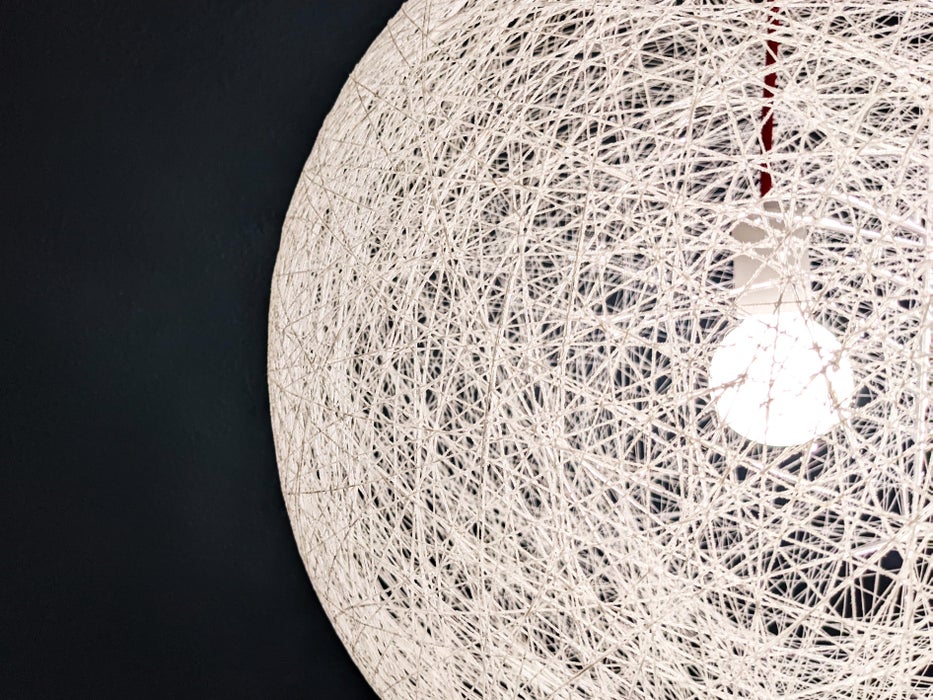
In this Instructable, I’ll show you had to make 2 versions of a cube/cuboid string pendant lamp, a simple version and a more refined version. I also made a YouTube video of the whole thing if you’d prefer to watch that instead of reading. Years ago, I saw one of those rough sphere pendant lights that are in all the designed magazines and was wondering why nobody made different shapes? I really thought it would be cool to make one with sharp edges, so I started designing how to do it.
Supplies
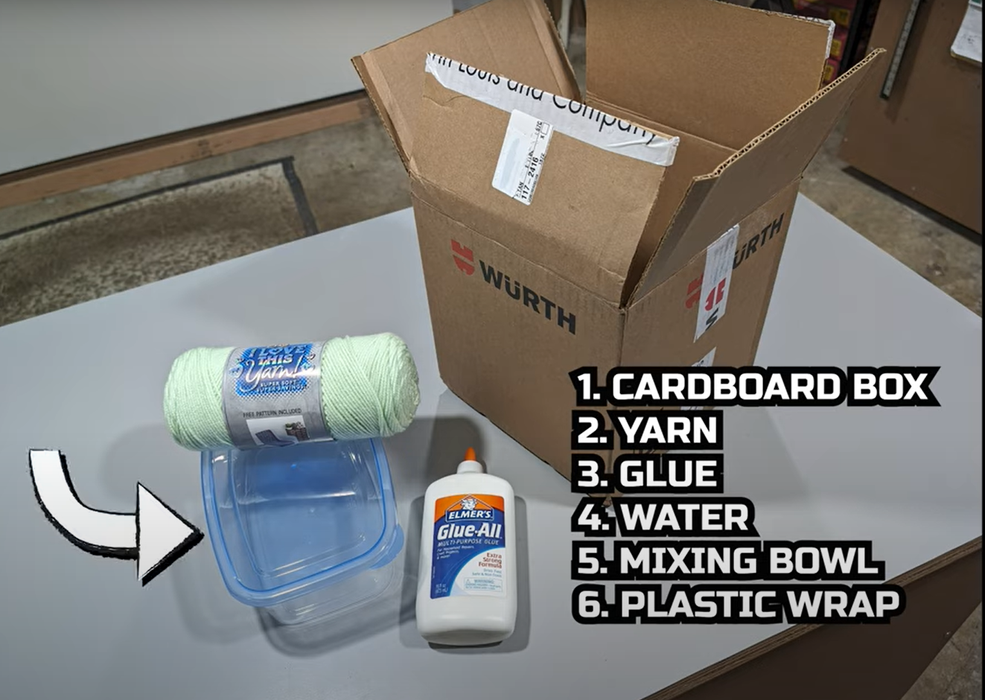
For the Simple version you need:
- White Glue
- Yarn (your choice of color)
- Cardboard box, or some kind of form.
- Packing Tape
- Optional = Plastic wrap
For the Refined version you need:
- Crochet Thread
- Epoxy Resin
- Gloves
- Formwork of some kind. I made this one with 3d printed parts and metal tubes, but my first versions were wood and metal. If you’re only planning on using the form one time, you can make it out of anything really, since you can destroy the form after the thread is dry and pull it out.
Step 1: Simple Version Process
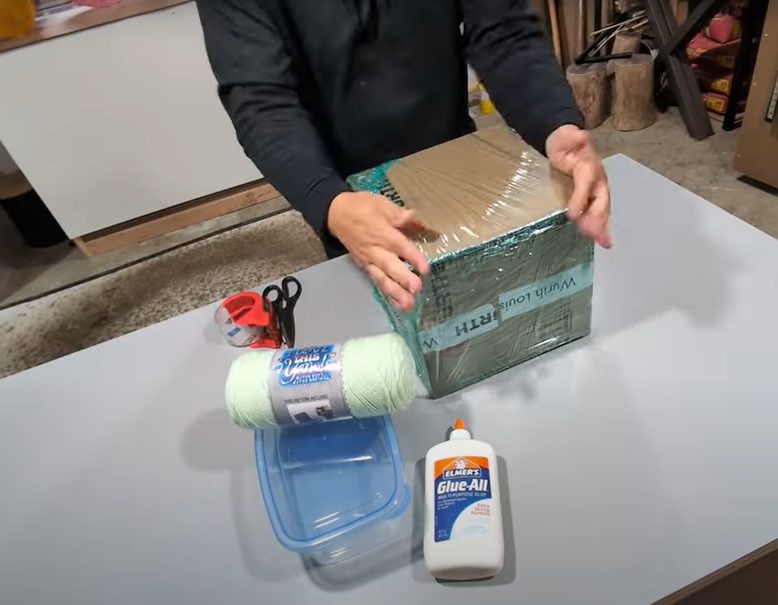
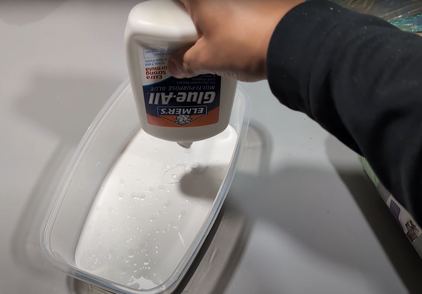
You might have seen people do this with a yoga ball or balloon in past videos, but to make a square, it’s pretty much the same thing with a different shape. You need to get the box out somehow, so for mine, I just left one side open and not wrapped, as you can see in the photos.
So for the simple version, I’ll break it down into simple steps.
- Obtain the Supplies listed above.
- Tape your cardboard box closed, and wrap it in plastic wrap or packing tape (clear). This will help so that the glue doesn’t stick to the cardboard box.
- Mix up some white glue and water. Not too watery, but just enough so that it will absorb into the yarn better. Soak the yarn in the glue mixture. Turn the roll over a few times in the mixture to get it coated as well as you can.
- Put some protective paper or plastic down on your table/work surface because the glue mixture flies off the yarn a bit and makes a mess.
- Start wrapping the box with the soaked yarn. It works best to tie the yarn after your first time around and then just keep wrapping, covering up any open spots as you go. Make sure to leave one side of the cube unwrapped so that you can get the box out at the end.
- Once the box is wrapped as much as you see fit, set the item aside and let it dry. Mine took about 2.5 – 3 days before it was completely dry (in a 60F degree garage). Look for the puddled up glue to turn clear and feel it to make sure it’s all dry.
- Remove the box from the form. I had to cut my box up a bit to get it out since I wrapped it so tight, but the plastic wrap made it easy to get out after I loosened it up a bit. You may get lucky and have it slide right out.
- You should have a cool shaped pendant in a 5-sided cube/basket shape. Just insert your light cord through the top center and hang it up. If you’re not already using them, I’d recommend using LED Bulbs instead of the older Incandescent bulbs. The incandescent bulbs tend to get too hot and can potentially cause a fire. Plus the LED lights use a lot less energy and save you money.
Step 2: Refined Version
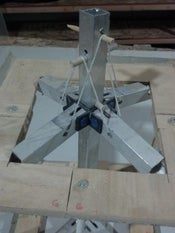
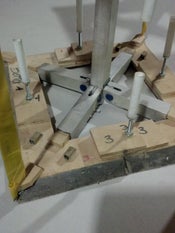
So for the more refined version, I wanted it to be more light and airy, so tried all sorts of strings, yarn, and thread and ended up with #10 crochet thread. The problem was that just using glue didn’t make it stiff enough to hold the shape since the thin thread couldn’t absorb that much glue. After thinking for a while, I thought about Epoxy. I was surfing a lot at the time, so it was a natural thing to use it. The thin coating of Epoxy made it super strong, especially as all the layers crisscrossed each other and basically glued themselves into a giant birds nest structure to keep the shape.
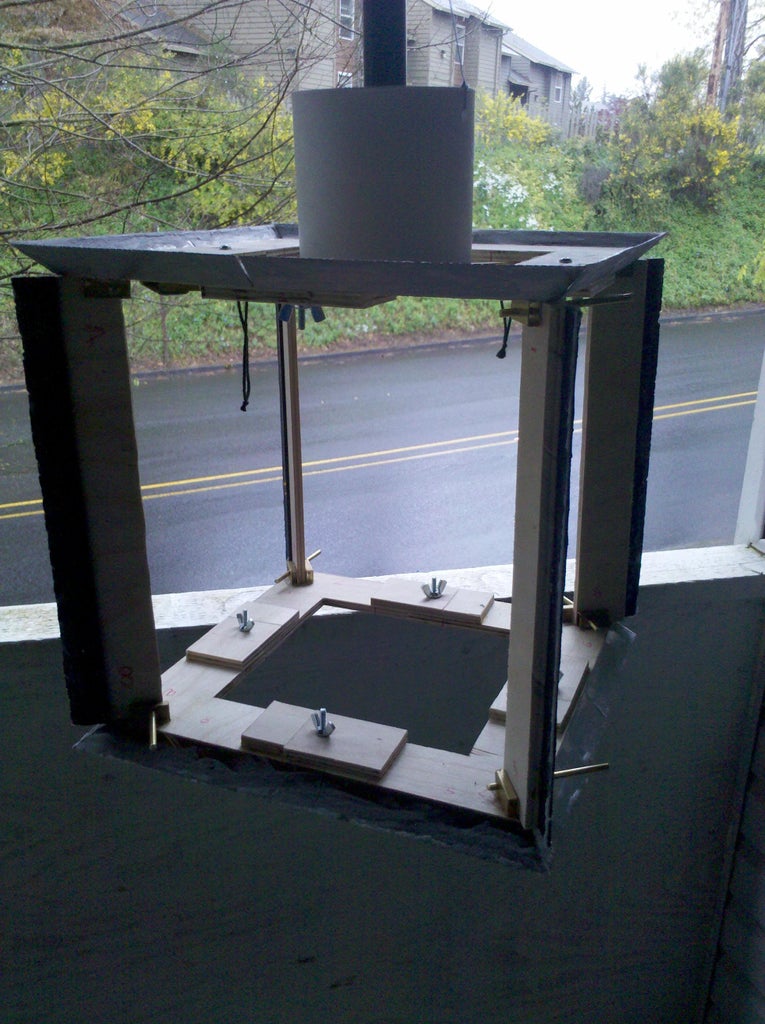
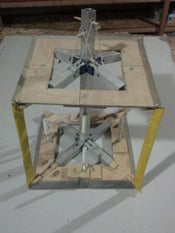
I also really wanted to have the string on all sides, so I came up with this jig/formwork that could all disassemble into smaller pieces and come out through the center ring at the top. My first version of this back in 2009 was made with simple materials and cut with a Dremel. It wasn’t anything fancy, but on the 2nd try I got it to work. Make sure whatever you use as the formwork can come out in small enough pieces to come out the top. I’ll put a few pictures of my early wood versions, but the final version I recently finished was made with 3d printed parts and 1″ aluminum tubes as connectors between the parts.
Step 3: Make the Formwork
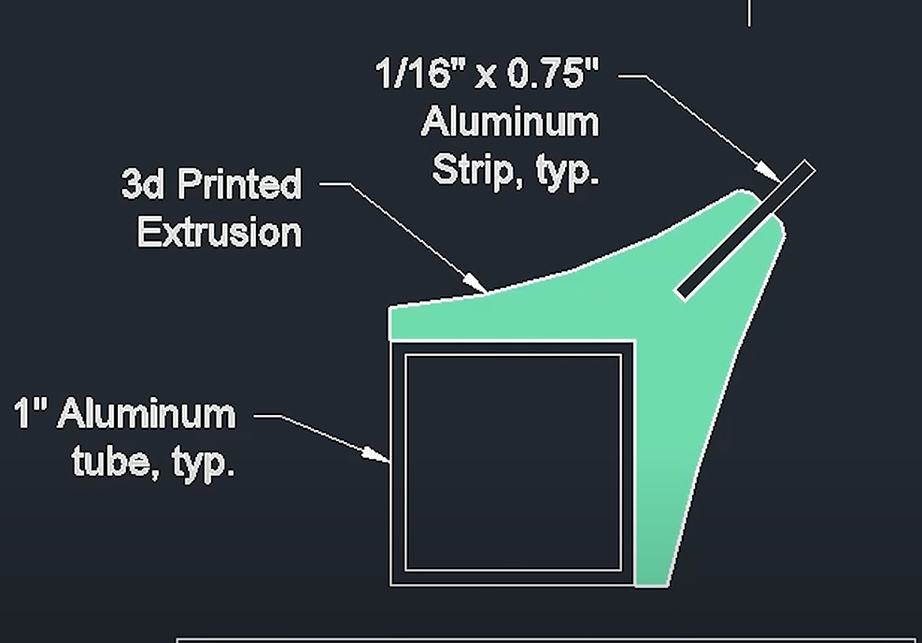
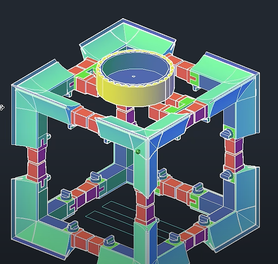
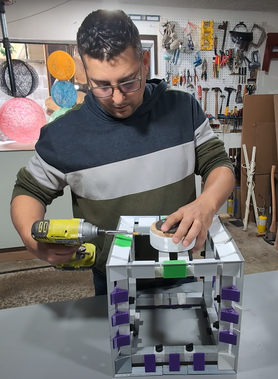
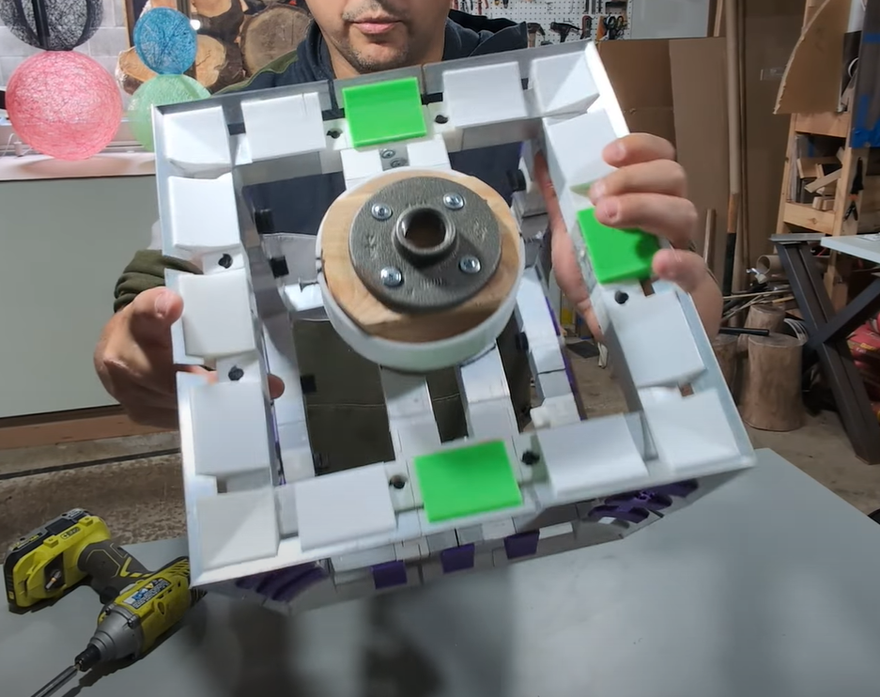
If you’re only making one lamp, you could really use a variety of materials, but just know that you might have to break the inside form to get it out. I wanted to be able to reuse my form, so I made it in pieces that could methodically slide out. The 3d printed parts are held together with a pin that only has to be turned a 1/4 turn to release. I originally used screws, but it became tedious to try to unscrew so many screws while reaching through the top hole. I got a little more into it in my video, but I’m sure you get the point. The image shows the basic profile of what I used to make my form. By making it so that the corners were fixed, I could change the length of the tube connector in the middle and basically make any size I wanted by only changing the tube size. I thought about 3d printing the whole thing, but was worried it may not be strong enough under the tension of wrapping the whole thing. The metal tubes along with the metal fins really helped stiffen up the whole structure. The metal fins were also important because they provide a nice thin edge to create the corner on.
Step 4: Wrapping the Form
3 More Images
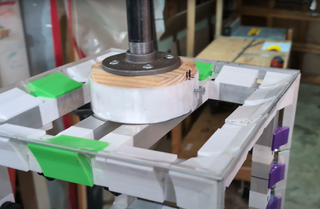
To make wrapping the form with thread easier, I found that it was easiest to have the whole form mounted to the ceiling and floating off the ground. I used 3/4″ pipe flange mounted to some wood blocking on the ceiling, with a 3/4″ tubes extending down and connecting to a 3/4″ pipe flange on top of my formwork. The flange connection on top of the formwork makes it really convenient to take off if you’re making more than one at a time, or just want to let the pendant hang somewhere else while drying/hardening. Having it mounted/suspended in some way makes it extra convenient to move around the whole form and wrap it. If you have the form just sitting on a counter, it’s harder to keep move the formwork around while also wrapping the whole thing with thread. It’s much faster to mount it somehow and walk around the whole thing. The picture shows how I have the form mounted to the pipe and then have an extension arm off of it to hold the resin and thread. That arm rotates around the form by putting a hole through the arm and sliding it onto the pipe. The wood may want to create a creaking sounds as you go around the pipe, so I solved this by putting a coat of Paste Wax onto the metal tube where it was touching and this smoothed out the movement and got rid of the sound.
The next part to think about is how to get the thread coated in resin. I have tried 20+ different methods and found that the easiest way was to get a hard plastic cup (Solo Cups are super thin and tend to melt from the exothermic reaction as the resin cures, I’d avoid these….I’ve used) and drill a hole in the bottom and cover it with 2 layers of duct tape. The thread is then put through a needle and pushed through the tape from the inside of the cup.
Since the hole in the tape is so small, it keeps the epoxy in the cup and pulls off the extra resin that is on the thread, so that there’s only a thin coat covering and soaked into the crochet thread.
The last step before wrapping is to put something on the edges that the epoxy won’t stick to. I use clear packing tape on the edges of this form. The plastic wrap that comes on the big roles for moving also works pretty well for things like a Yoga ball. Normal Kitchen plastic wrap seems to be a different type of plastic and does not work. The epoxy will stick to it. You could also use some kind of mold release, silicone spray, or oil, but that can get a bit messy and leave a residue on your form that you may not want. You can use a mix of these items and see what works best for your form and materials.
Now wrap around the whole form until you feel like the density is how you like it. The more you wrap it and cover up the holes, the more it will block out the light.
The epoxy I use says it has a 20 minute set time, but I find that I get longer than that. Usually in the 30-40 minute range if it’s above 70 degrees, but well over an hour in the winter months when it’s colder in my garage. It tends to slow down the chemical reaction in the epoxy. Only use the Epoxy in small amounts to make sure you can wrap the form enough before it hardens to avoid wasting the expensive materials.
Step 5: Remove the Form From Pendant
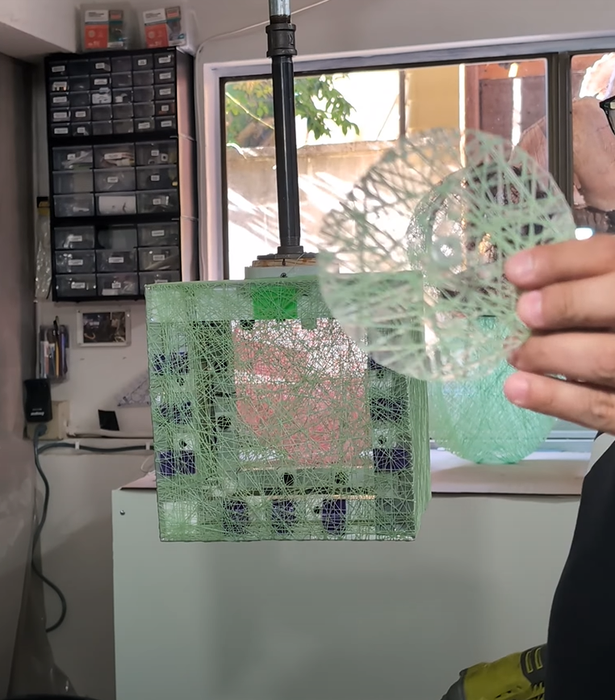
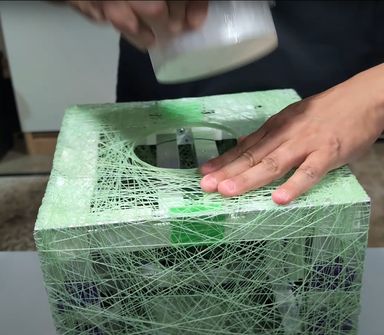
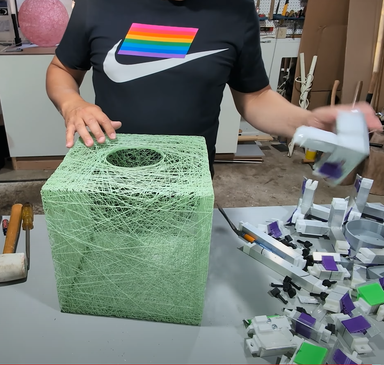
Now that the form is wrapped, you have to let it dry. My 20 minute set Epoxy tends to need about 36 hours to fully harden in 70+ weather, and up to 5 days in the colder months. This will vary depending on what epoxy you use, but by touching the pendant, you can feel the difference. It starts out pretty sticky, then it will feel dry and soft, then after a bit more cure time, the form gets hard and strong. You may have to use your best judgement, just don’t take it out too early.
Remove your form from the pendant. I designed mine so that there is a ring structure on the top that can be used for mounting, and all the pieces come apart and are able to come out the top hole to minimize the non-covered area on the pendant. Just make sure the hole is big enough to fit your hand/arm in and big enough for your largest part.
Step 6: Final Assembly
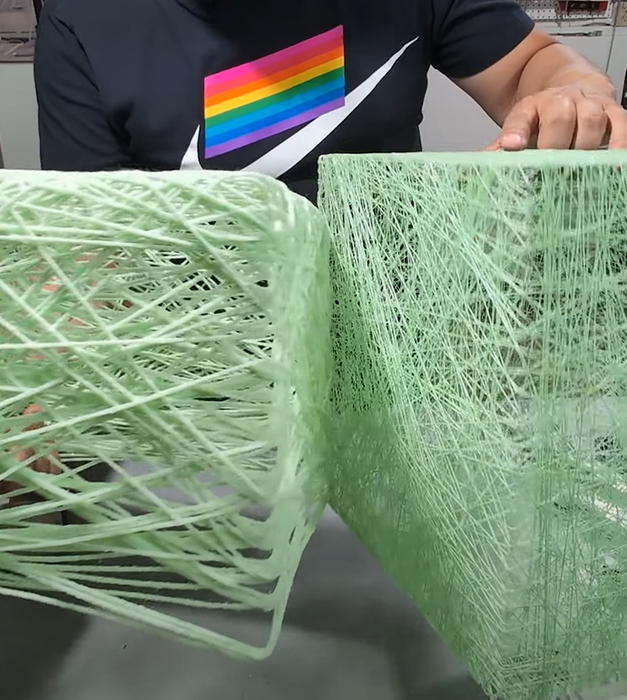
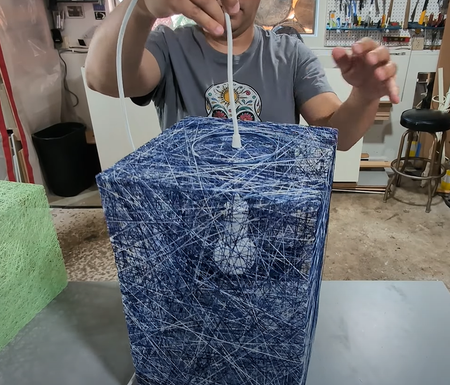
I added a picture in here to show the “Simple” version compared to the “Refined” version. You can really tell the difference with the thread thickness and the sharpness on the edges.
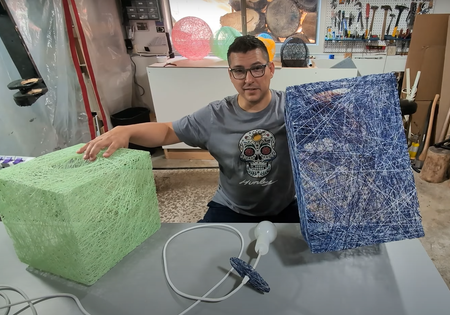
I ended up making a 2nd version of this pendant in a slightly bigger size that you can see in the picture. The green one is 12″ x 12″ x 12″ and the Blue one is 12″ x 12″ x 18″. I used the same form as the 12″ cube, but changed out the connectors on one axis to make it 6″ longer. The reusability worked great. I really like the how the “Shades of Blue” thread makes the finished product look since it goes from white to dark blue with all the shades in between. It really adds some depth to the look of the final piece.
So now that you have the dry, finished forms, you need to add a light. You could use a simple pendant connection that just screws onto the top plate, but I wanted to have the bulb more centered in the pendant, so I used some cloth covered cord (from ColorCord.com) and their hardware to have the bulb height be adjustable from the top plate.
The top plate was made with a 1/8″ piece of clear acrylic wrapped in the same thread. The shape should be a circle just slightly larger than the hole you’re putting in the top. Then slice 2 straight sides that are just slightly smaller than the top opening. The sliced edges let you slide the top plate into the hole, but then the oversized part lets the pendant sit on the mounting plate. Make sure to add the hole for the cord stay in the acrylic before wrapping it. Thread your wiring through the cord stay and adjust to whatever height works with your pendant. As you can see in the photo, the hole in the top pretty much disappears when you add the thread covered top plate. the plain clear plate would look good also, but I think this really finishes off the look.
Step 7: Final Shots
