
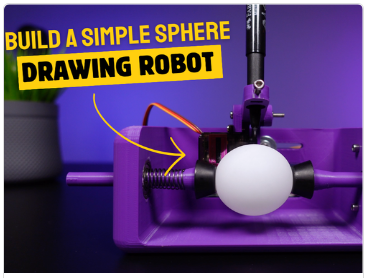
In this article, we will learn how to create a simple yet impressive sphere drawing robot. I discovered this intriguing project on Thingiverse a few days ago and decided to make a video about it because I found it very interesting. However, my experience with this project wasn’t without its challenges. I encountered several problems, but I devised my own solutions to overcome them and make the project a success. In this tutorial, you will not only see how to build the sphere drawing robot but also find tips on dealing with potential issues and their solutions. Join me on this journey to create an awesome sphere drawing robot!
Step 1: 3D Parts and Building the Structure


3 More Images
In the first step of the project I will assemble the 3D parts and build the project, if you don’t have a 3D printer you can use PCBWay’s 3D printing service. 3D models are printed in medium-quality without support. Screw types are M3 but sizes may vary, use only those that are compatible in your workshop.
- Ball Bearing 608 8mm x 22mm x 7mm – https://amzn.to/4cOt0U9
- 28BYJ-48 ULN2003 5V Stepper Motor – https://amzn.to/3KuDNa2
- MG90s Servo Motor – https://amzn.to/4ebNZBO
- Suction Cups – https://amzn.to/3VK268Y
- Spring 10mm – https://amzn.to/3RXdeON
- 3D Printer – https://amzn.to/3yUe2gB
- PLA Filament 1.75mm Purple – https://amzn.to/4e8tR3r
Here is the link (https://www.thingiverse.com/thing:1461709) to the original 3D parts. For this project, I had to modify the 3D models a bit, so you can get the modified versions below.
Attachments
- rotationalaxis_V2.stlDownloadView in 3D
- idler_V2.stlDownloadView in 3D
- penholder.stlDownloadView in 3D
- armvert.stlDownloadView in 3D
- armmount.stlDownloadView in 3D
- frame.stlDownloadView in 3D
Step 2: Electronics and Printed Circuit Board


5 More Images
In the electronics part of the project, the source code is based on Atmega328P, and ULN2003 motor drivers are required for the stepper motors. You can build the project on a breadboard following the circuit diagram, but as you know I prefer to design a printed circuit board for a more professional prototype.
I share my printed circuit board designs as open source on PCBWay’s project sharing page, where you can easily order the printed circuit boards I use in my projects, both assembled and empty PCBs. You can choose PCBWay for low-budget and high-quality printed circuit boards.
Let’s continue the project by soldering the components used in the printed circuit board, all the necessary components are listed below.
- Atmega328P-PU Microcontroller DIP28 – https://amzn.to/3V50JBH
- CH340G SOP-16 USB to Serial Adapter IC – https://amzn.to/3Vpc7tt
- Electrolytic Capacitors Kit (10uF 16V) – https://amzn.to/4e7wiDl
- Multilayer Ceramic Capacitor Kit (22pF, 10nF, 100nF) – https://amzn.to/456I0dB
- JST-XH Connector Kit (XH-5A) – https://amzn.to/3KuXAGw
- 2.54mm Male and Female Pin Header Kit – https://amzn.to/3yMxGva
- 5mm LED Light Emitting Diode – https://amzn.to/3VbMta2
- Carbon Film Resistors (220, 1K, 10K) – https://amzn.to/3Voxhb0
- Screw Terminal Block Connector (5mm 2 Pin) – https://amzn.to/3X7uwMr
- USB Type B Female Port 4-Pin – https://amzn.to/4b318ut
- Crystal Oscillator Kit (16MHz, 12MHz) – https://amzn.to/4bLKwbw
- Soldering Iron Kit – https://amzn.to/4aPQRl3
Attachments
Step 3: Programming (Side of Arduino IDE)


After soldering, complete the connection of the motors, 5-volt power supply, and USB connections, then let’s move on to programming. In the source code section, first download and install the previous version of the Arduino IDE 1-8-5.
Download the EggDuino source code by going to the GitHub page. Unzip the zipped file and edit the folder name (EggDuino), then copy the EggDuino folder and paste it into the Arduino Libraries folder in the My Documents folder.
Open the EggDuino source code, if the Accel Stepper library is not installed, you should install it first.
#include "AccelStepper.h" // nice lib from http://www.airspayce.com/mikem/arduino/AccelStepper/
In the bottom lines of the source code, you can see the pin order to which the Stepper Motors are connected, you can update the motor pin here.
//make Objects
#ifdef BOARD_ULN2003
AccelStepper rotMotor(AccelStepper::HALF4WIRE, 2,4,3,5, true);
AccelStepper penMotor(AccelStepper::HALF4WIRE, 6,8,7,9, true);
#else
There is also the pin number to which the Servo motor is connected in the upper lines.
#ifdef BOARD_ULN2003
  // Mini Spherebot using 28BYJ-48 Steppers with ULN2003 Drivers
  // http://www.thingiverse.com/thing:1461709
  #define rotMicrostep 16
  #define penMicrostep 16
  #define servoPin 10
  #define engraverPin 11
If you have done all the updates, select the Arduino board and the port it is connected to and upload the source code.
Step 4: Inkscape Software and EggBot Extension


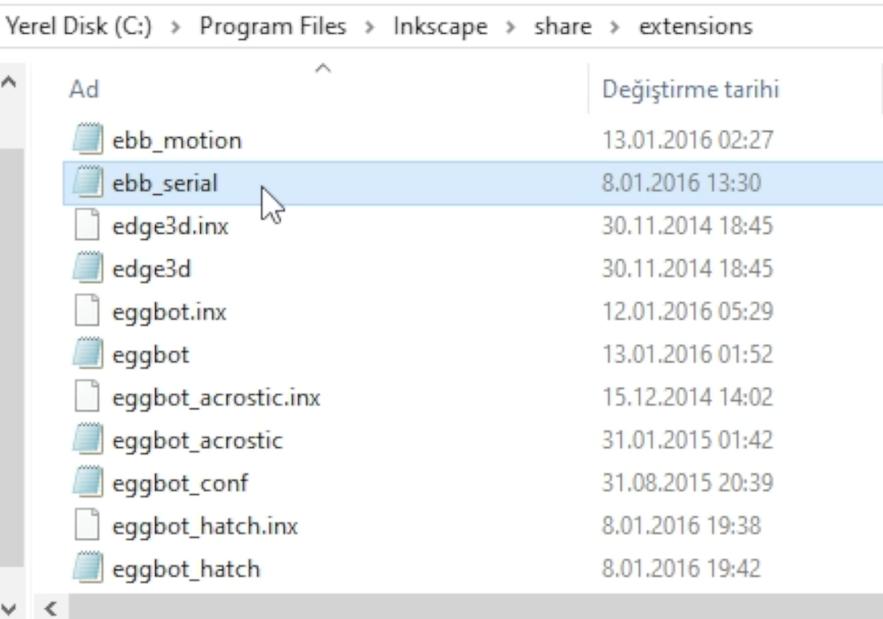
Inkscape software version 0.91 will be used to create templates and draw. Find and download the installation file for your operating system. Then complete the installation of the software. At this stage, we must install EggBot version 2.7.1, a popular extension to enable Inkscape software to communicate with the board and get a control interface. Download the right package for your operating system, extract the zipped folder, and copy all the files in the Extensions folder. Then go to the file location where Inkscape is installed, find the Extensions folder in the Share folder, and paste the files into it.
- Inkscape 0.91 – https://inkscape.org/release/inkscape-0.91/
- EggBot Extension 2.7.1 – https://github.com/evil-mad/EggBot/releases/tag/2.7.1
Step 5: Making the EggBot Extension Compatible (Important Modification)

5 More Images
Now we are at the most important update part, if you have done some research for EggBot, you can see many entries about the extension causing communication problems (Unable to find an Eggbot on any serial port) with different boards like Arduino. You can solve this problem with three different methods, open the “ebb_serial.py” file with a text editor, find the lines shown on the screen.
- The first solution is to enter the USB port address to which the Arduino board is connected and define it directly. However, if you want to use a different USB port after this change, you must update the port address again.
- The second solution is to add a serial port definition named “Arduino” along with the serial port definition named “EiBotBoard“.
- The third and last method is to enter the value of your board’s device path instance (VID/PID) directly, which is also available in the device manager.
if comports:
		comPortsList = list(comports())
		EBBport = "COM3"
		for port in comPortsList:
			if port[1].startswith("EiBotBoard") or port[1].startswith("Arduino"):
				EBBport = port[0] 	#Success; EBB found by name match.
				break	#stop searching-- we are done.
		if EBBport is None:
			for port in comPortsList:
				if port[2].startswith("USB VID:PID=1A86:7523"):
					EBBport = port[0] #Success; EBB found by VID/PID match.
					break	#stop searching-- we are done.
		return EBBport
I chose to use all three methods together, be sure to save the file after making the changes.
Step 6: First Drawing


The programming part to control the sphere robot is done, now open Inkscape software, then select EggBot from the templates, import a sample vector image, and insert it into the template.
Open EggBot control from Extensions, this interface allows you to easily adjust many settings. First, enter the Servo up and down angle values and click Apply, you will observe your pen moving up and down.
Then you can also manually send some commands to the robot and observe the movements at the same time. For now, everything seems to be ready, the communication with the robot is working without any errors, so let’s draw the first example and let’s see!
Step 7: Failure! Causes and Solutions


As you can see, many prints have failed, and from all these experiences I have identified three problems. The first is that the hobby stepper motor has some slack in the shaft and as a result the pen axis wobbles. At first I was going to replace the motor, but I realized that this problem is chronic in the same type of motor, so I had to either use a larger more stable motor and throw the whole project in the trash, or find another solution. So I attached a simple rubber band to the motor on the axis where the pen is located, and then stretched the rubber band and fixed it to the main part with the help of a thumbtack. Thus, when the pen axis is running, the shaft slack jerk of the motor is prevented by the rubber band.
The second problem was that the brackets holding the sphere were too hard and did not grip the sphere properly. I designed new sphere holders (the 3D parts shared above are updated version), and added suction cups on the ends so that the sphere can move in a balanced way.
Step 8: Final Touch and End of the Project


Finally, I reduced the timing values in the EggBot control interface to balance the shaft slack of the stepping motor on the sphere axis and to make a smoother drawing. As a result of all these solutions, I obtained more balanced and smoother drawings. This project aims to build a simple and budget-friendly sphere drawing robot, this project can be improved with higher quality motor types. Thanks for reading, I hope this Instructables has contributed to you.


