Introduction
In the world of DIY audio projects, creating your own paper diaphragm Rubanoide speakers offers a unique and rewarding experience. These speakers, known for their exceptional sound clarity and efficiency, utilize a paper diaphragm to produce high-quality audio output. Whether you’re an audiophile looking to enhance your home audio system or a hobbyist eager to explore the intricacies of speaker design, this guide will walk you through the process of building your own Rubanoide speakers. From gathering materials to assembling the components, we will cover each step in detail, ensuring you achieve a professional result that will impress both your ears and your friends. Let’s dive into the fascinating world of DIY speaker creation and bring your audio dreams to life!
We will be making an affordable design using 80gsm paper for the diaphragms and inexpensive ferrite magnets to get you acquainted with the concept, from there you can start experimenting with more exotic diaphragm materials and neodymium magnets.
Step 1: Supplies:
To build your own you will need the following:


- 80gsm A4 paper Amazon – A4 Black Pad 80gsm 50 Sheets
- Ferrite magnets approximately 20mm X 30mm Amazon – Ferrite Blocks Ceramic Magnets, 1 7/8″ x 7/8″ x 3/8″
- Access to a 3D printer Amazon – Creality Resin 3D Printer Halot-Mage
- 2040 Aluminium extrusion Amazon – 400mm V Slot 2040 Aluminum Extrusion
- 12mm X 24mm Wood slats
- At least 5M of 0.15mm enamelled copper wireAmazon – 0.15mm Dia Magnet Wire Enameled Copper Wire
- CA Glue (superglue) low viscosity Amazon – Starbond 2 oz. Thin Super Glue
- 15mm Double sided tape Amazon – 3M Double Sided Tape Heavy Duty
- Brass heat inserts Amazon – 415Pcs M2 M3 M4 M5 M6 Threaded Inserts


*As an Amazon Associate I receive a small percentage from sales made through provided links at no cost to you, this helps fund future projects.
Step 2: What Is a Rubanoide Speaker?
Rubanoïde. The name derives from the French word ruban which is equivalent to the English ribbon. The “oid” suffix turns it into “ribbon-like” as this new driver operates similarly to the way ribbon speakers work while still being different from a true ribbon. The basic Rubanoïde concept was developed by a French engineer who is nearly 80 years old today. He labored over this project for 20 years because his invention, while deceptively simple in concept, is quite tricky to implement and even more difficult to usher into regular production.
Swiss Audio Consulting has advanced the Rubanoïde development further by working on the wooden frame and other proprietary aspects. The Rubanoide development focused on a single driver with extension to 200 Hz. Audio Consulting offers a double-driver version, the Dvaijnoy, extending bandwidth to about 100Hz, “allowing for most critical fundamentals in natural instruments and human voices to be reproduced by this new breakthrough driver”.
The Rubanoïde works as a bipole unlike Magnepans, Apogees and most electrostatics. The use of very strong magnets achieves the high efficiency with a purely resistive impedance to work well with even single-ended triode amplifiers.
Step 3: Design the Driver:
First we need to design our speaker and for this we will jump onto Fusion 360.
I start by modelling all of the individual components that will make up the finished driver like the magnets and aluminium profile.
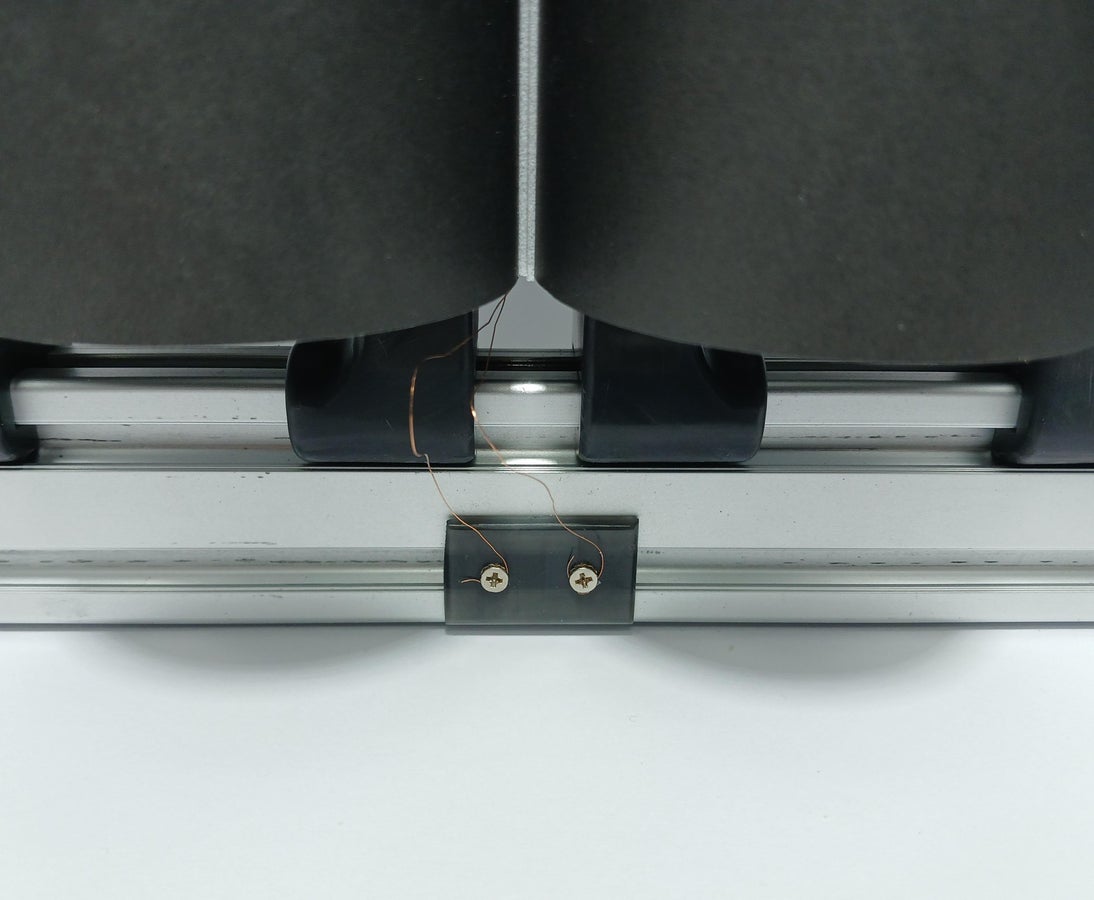
To save on materials I tried to keep the 3D printed parts to the minimum, the main four structural components are all identical and simply slide onto the wooden slats to make them mountable to the aluminium extrusion. To keep the delicate voice coil leads safe I designed a simple terminal mounting plate that slides onto the side of the extrusion that the leads can be securely soldered to.
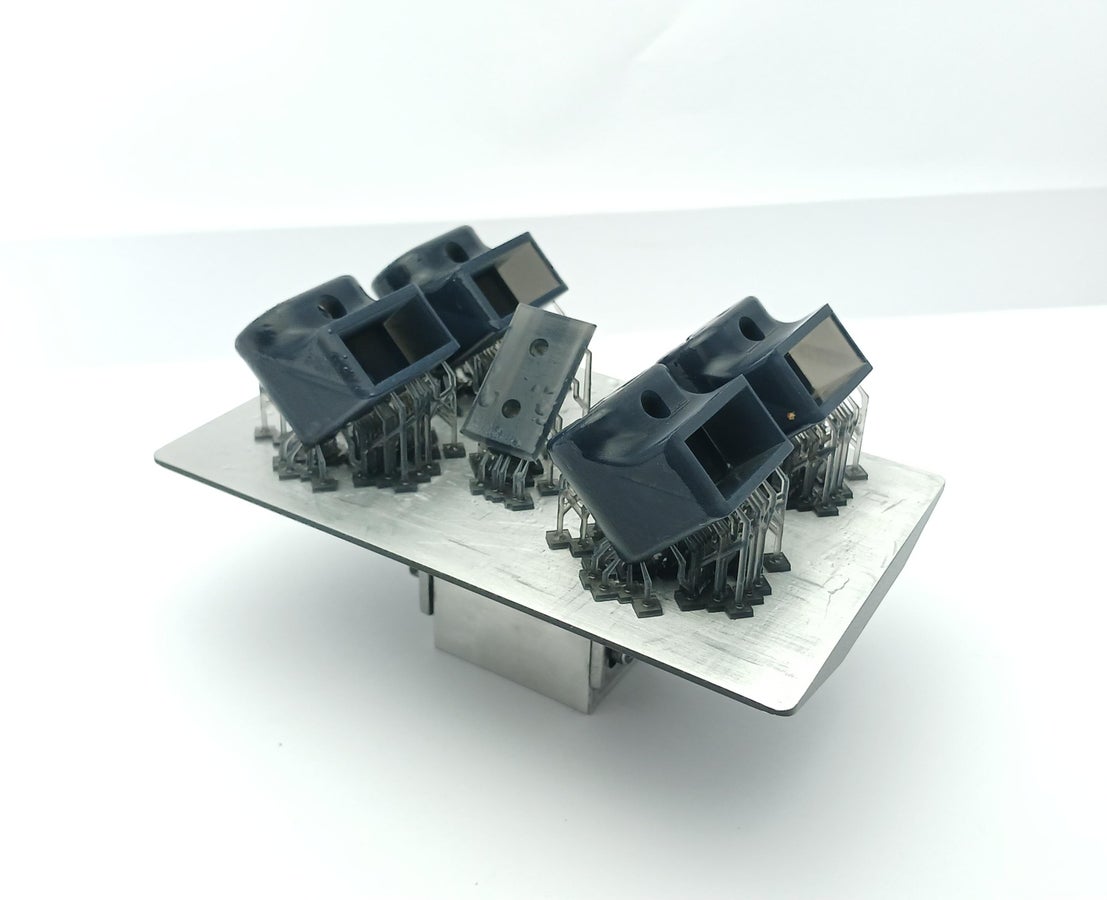
All of my parts were printed on a Creality Halot one resin printer using Sunlu ABS-Like resin.
To lock the mounts into their place on the aluminium extrusion I made use of 4mm brass heat inserts that I press into their dedicated slots with some CA glue to keep them secure, with this method you can slide the mounts freely and then simply tighten a M4 screw into the thread to clamp it into place.
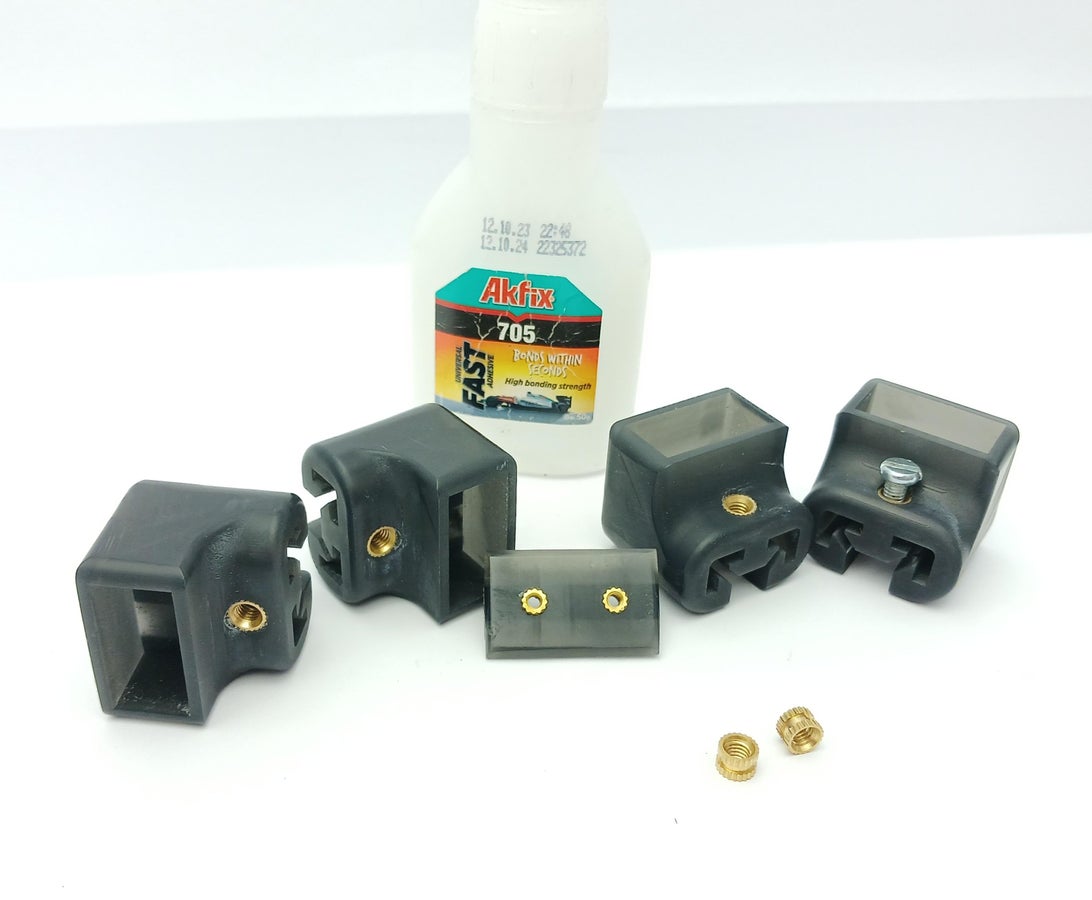
Paper Rubanoide
https://gmail2695488.autodesk360.com/shares/public/SH30dd5QT870c25f12fc44f4f37597f4842e
Attachments
- Rail Mount.stlDownloadView in 3D
- Top 1.stlDownloadView in 3D
- Top 2.stlDownloadView in 3D
- Feet.stlDownloadView in 3D
- Terminal Plate.stlDownloadView in 3D
Step 4: Making the Frame:
With the parts printed we can start by making the frame for the rubanoide driver.
For this step we will need:
- 1x piece of 2040 Aluminium extrusion cut approximately 300mm long.
- 4x pieces of 12mm X 24mm wooden slats cut approximately 250mm long.
- 4x printed mounts
- 1x Terminal plate
- CA glue
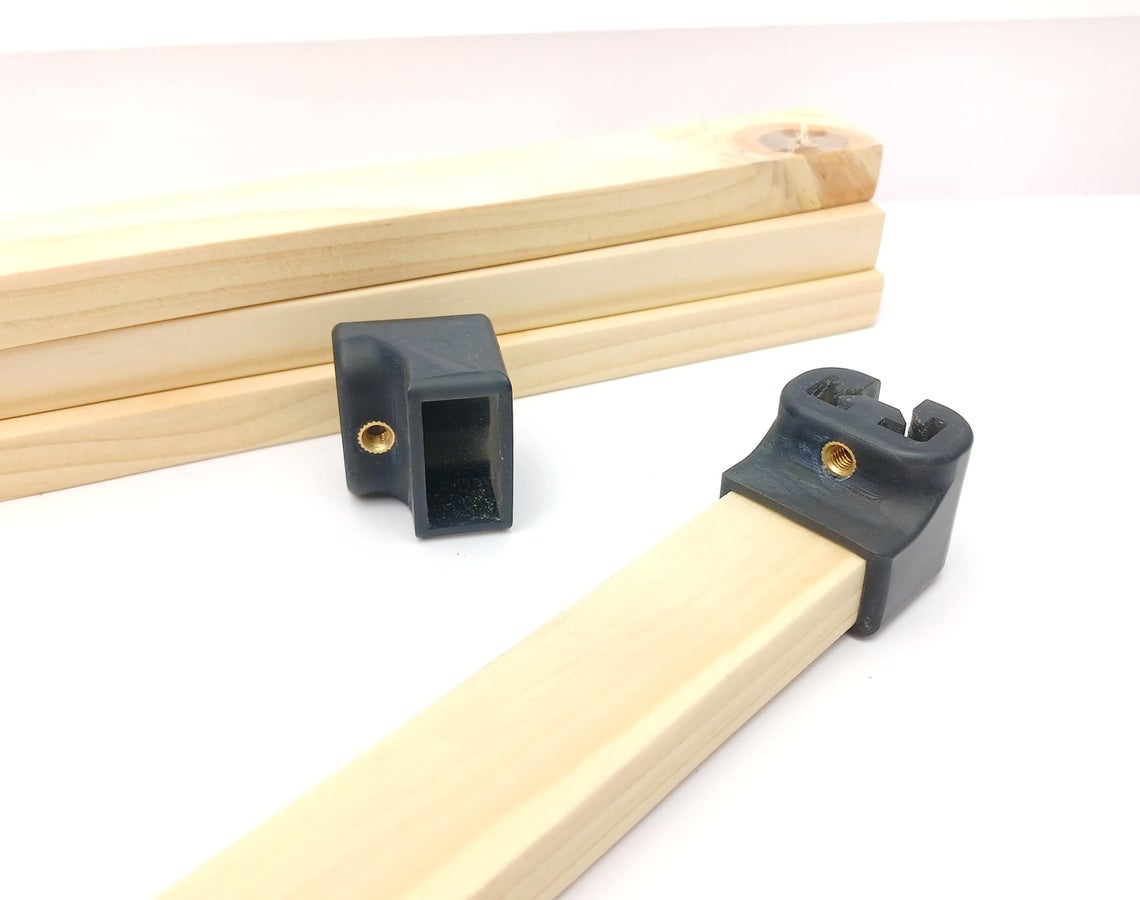
Thanks to the printed parts assembly is super simple, we simply need to push one of the printed mounts onto one end of each of the wooden slats along with a small amount of CA glue to keep it in place.
The terminal plate simply slides into place onto the extrusion from the side.
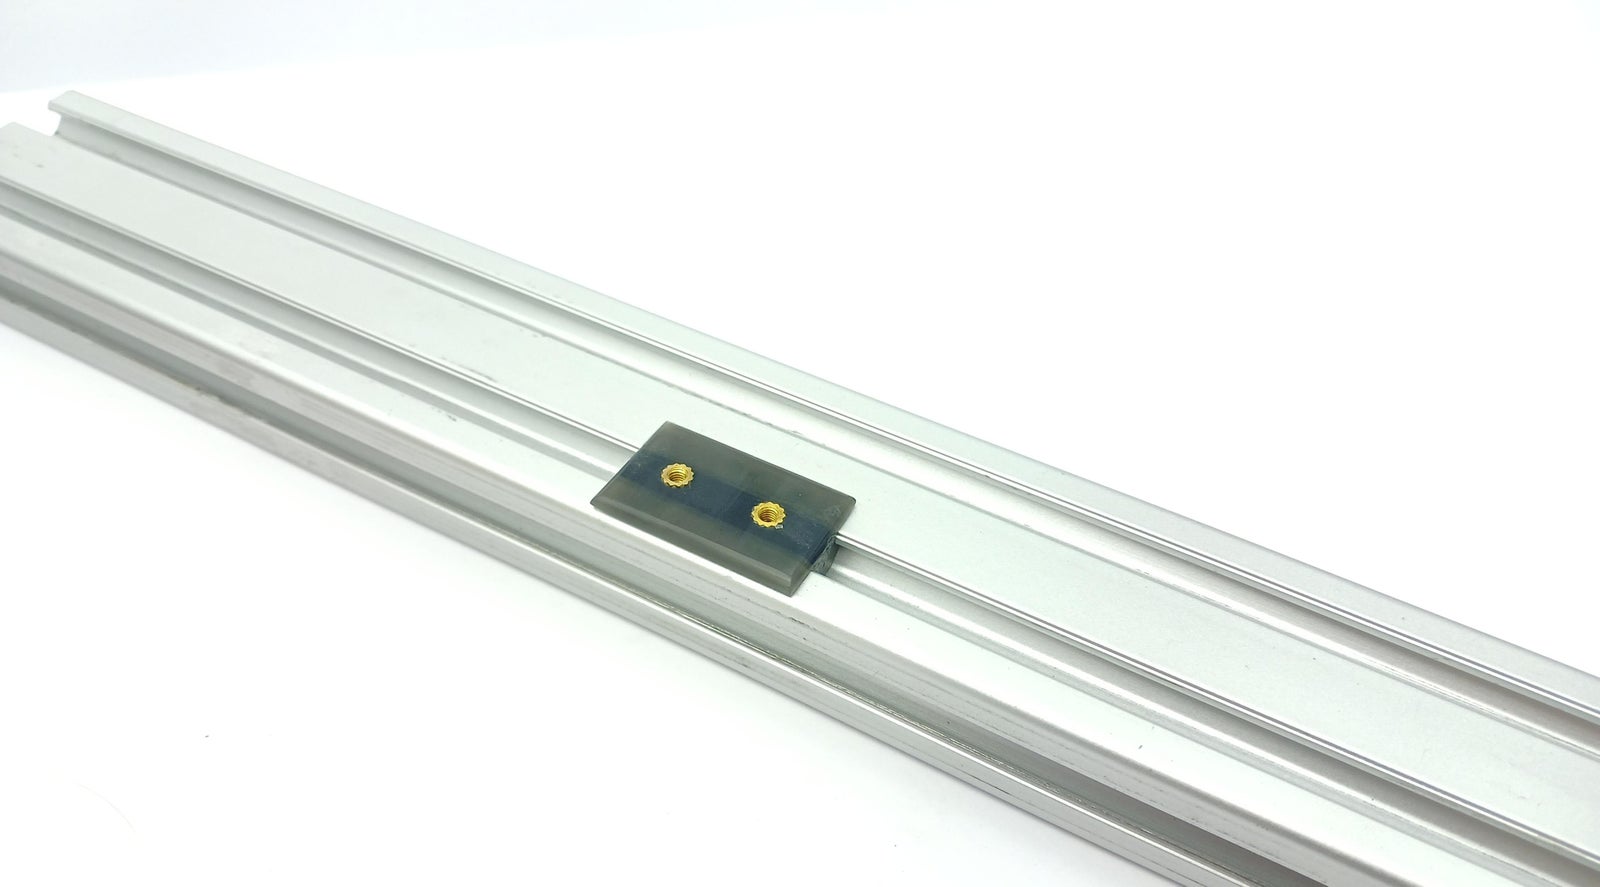
Before we can slide on the wooden slats we first need to make the magnet motor.
Step 5: The Voice Coil:
Now for the most important component of the build, the voice coil. As you will see in the next step as well I went through two different iterations of the coil and diaphragm to get the best result.
For this step we will need:
- Around 5 meters of 0.15mm enammeled copper wire.
- Clear PET packing tape
- CA glue low viscosity
- Empty DVD/game case
My first attempt (pictured above) was a piece of 8mm thick PVC sheet that was cut to 200mm in length, I wrapped one end of the PVC with a few layers of masking tape to act as a release between the plastic and the coil.
Using 0.2mm enamelled copper I started turning a coil around the edge, to get a 4Ohm voice coil I needed around 30 turns. Once I got to 30 turns I pressed all of the coils against each other to get a nice uniform coil and then applied a small amount of CA glue all around to solidify the coil.
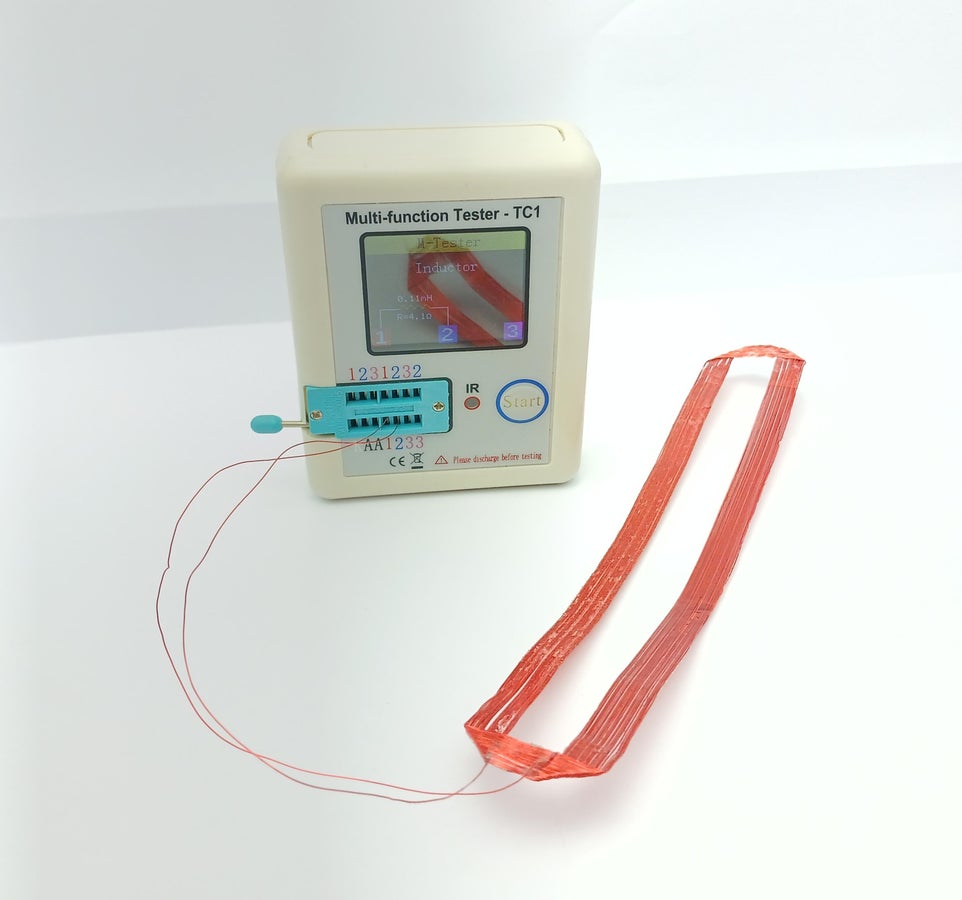
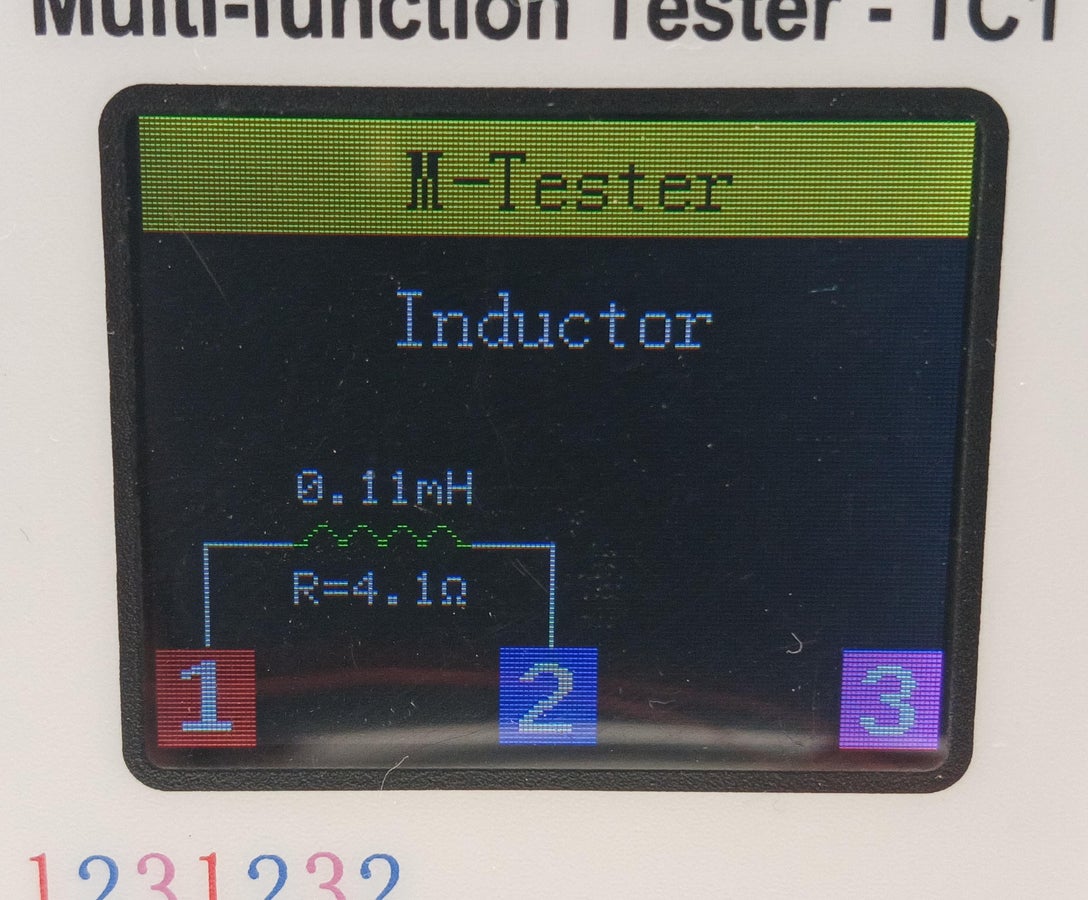
Once the glue set I removed the coil from PVC sheet, folded the two ends over to get a flat coil and tested it on my multifunction tester. So far everything was looking good.
The one problem I had was that the coil ended up being quite heavy, this I feared will have a negative effect on our speakers sensitivity and might also cause sagging and rubbing of the diaphragm.
Attempt number 2:
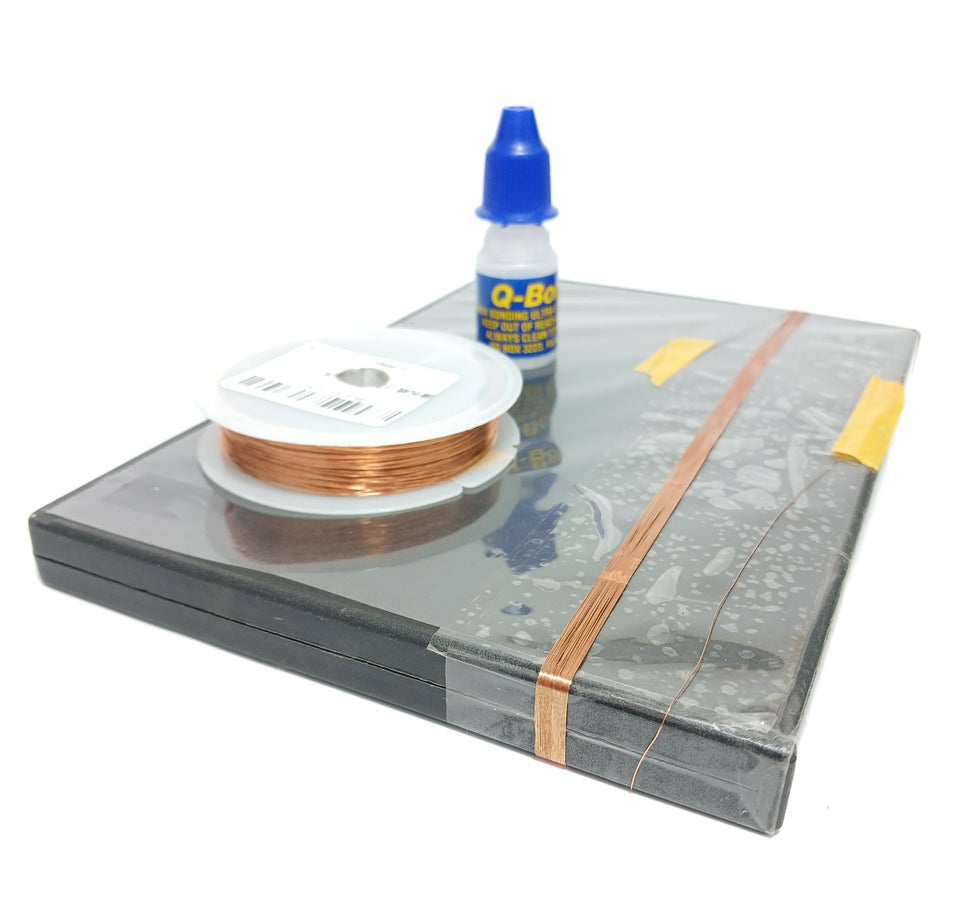
For the second attempt I realised that an old DVD case was the perfect size for an A4 size coil, plus the flexibility makes it much easier to remove the coil once formed. By adding a layer of packing tape over the case we prevent damage to the case and also the CA glue does not stick to it for easy removal.
This time around I used 0.15mm enamelled copper wire, this requires a little more patience to wind to prevent breakage but is still relatively easy and gives a much lighter coil.
Step 6: Attaching the Voice Coil to the Diaphragm:
With the voice coil formed we can now assemble the diaphragm.
For this step we will need:
- 15mm Double sided mounting tape.
- 80gsm A4 paper (I prefer the look of the black paper)
As with the voice coil I tried out a few different ways to mount the voice coil onto the paper diaphragm, my first idea was to mask a centre line on two A4 pages and then give them a good coat of spray adhesive. I then layer the coil onto the page and placed the second page on top, aligned everything and sandwiched it between two glass panes until the glue dried.
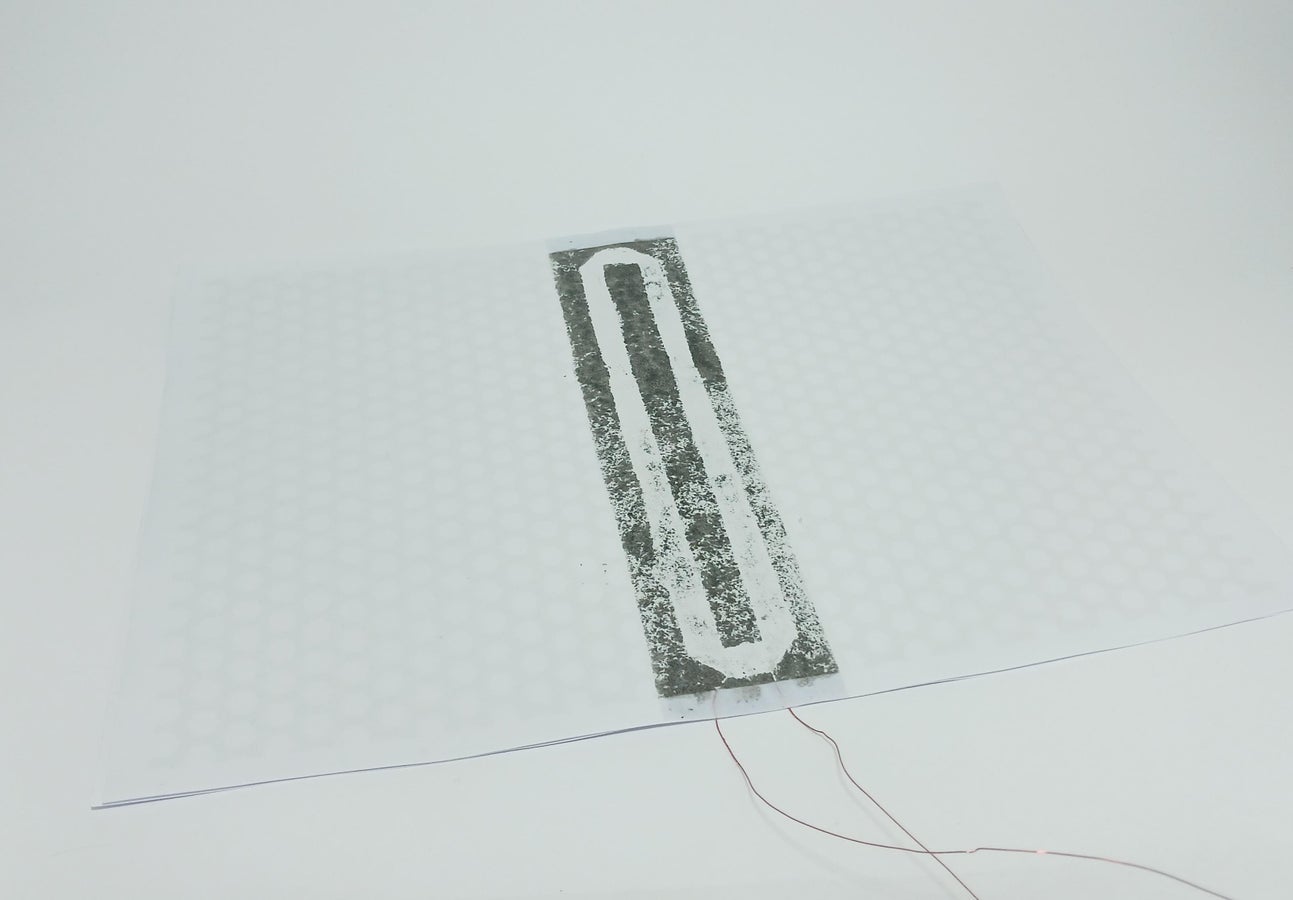
Unfortunately even though the pages were dried between the glass panes the moisture of the glue still deformed the paper and I was unfortunately left with a wonky diaphragm.
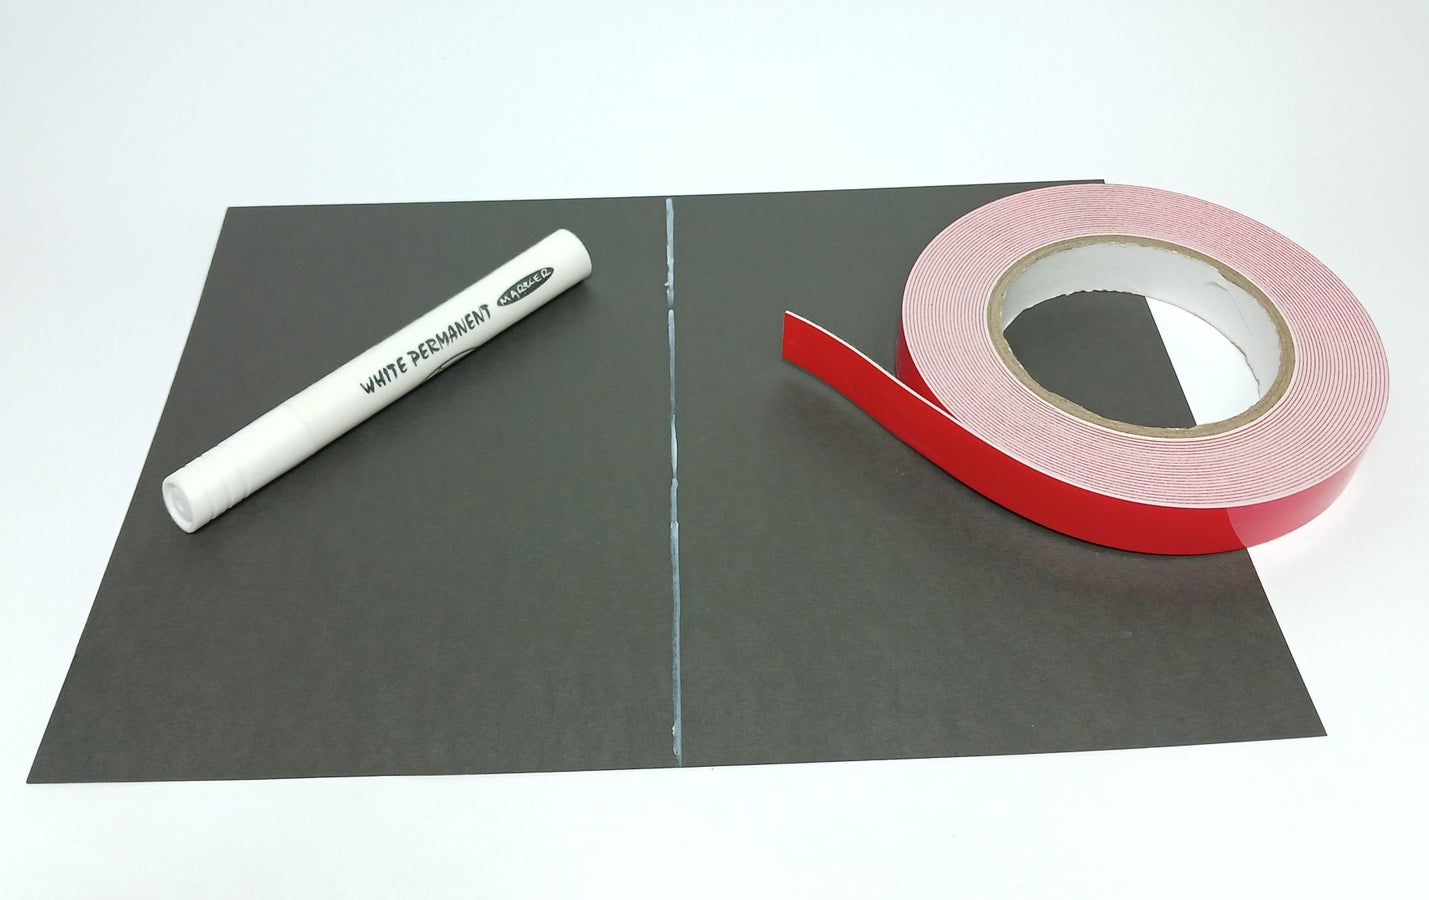
On the next attempt I was looking around my workshop to find an adhesive that had no moisture that could cause damage to the paper and I also wanted something that could give some dampening around the coil. It didn’t even occur to me at first that something as simple as double sided mounting tape was exactly what I was looking for.
The mounting tape gives incredible adhesion onto the paper, it adds a stiffening spine through the centre of the page, provide dampening around the coil and it weighs almost nothing.
I started by marking a line down the centre of two pages, I stuck down the 15mm mounting tape on both sides of this line to get a 30mm wide double sided mounting tape on both pages.
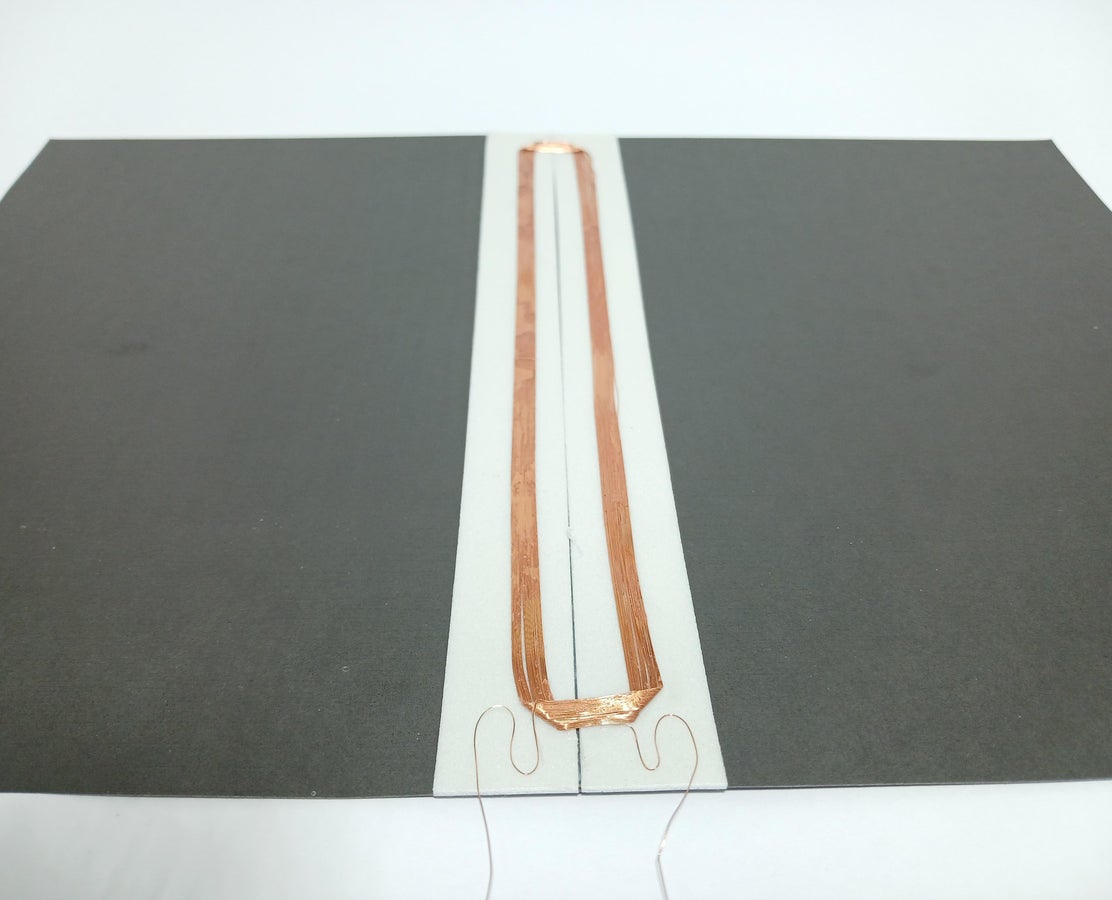
I removed the backing from mounting tape and layed the voice coil onto the centre of the tape, gently pressed it onto the tape and formed some strain relieves on the leads to prevent accidental breakages.
With the coil in place you can align the second page on top and press the two together.
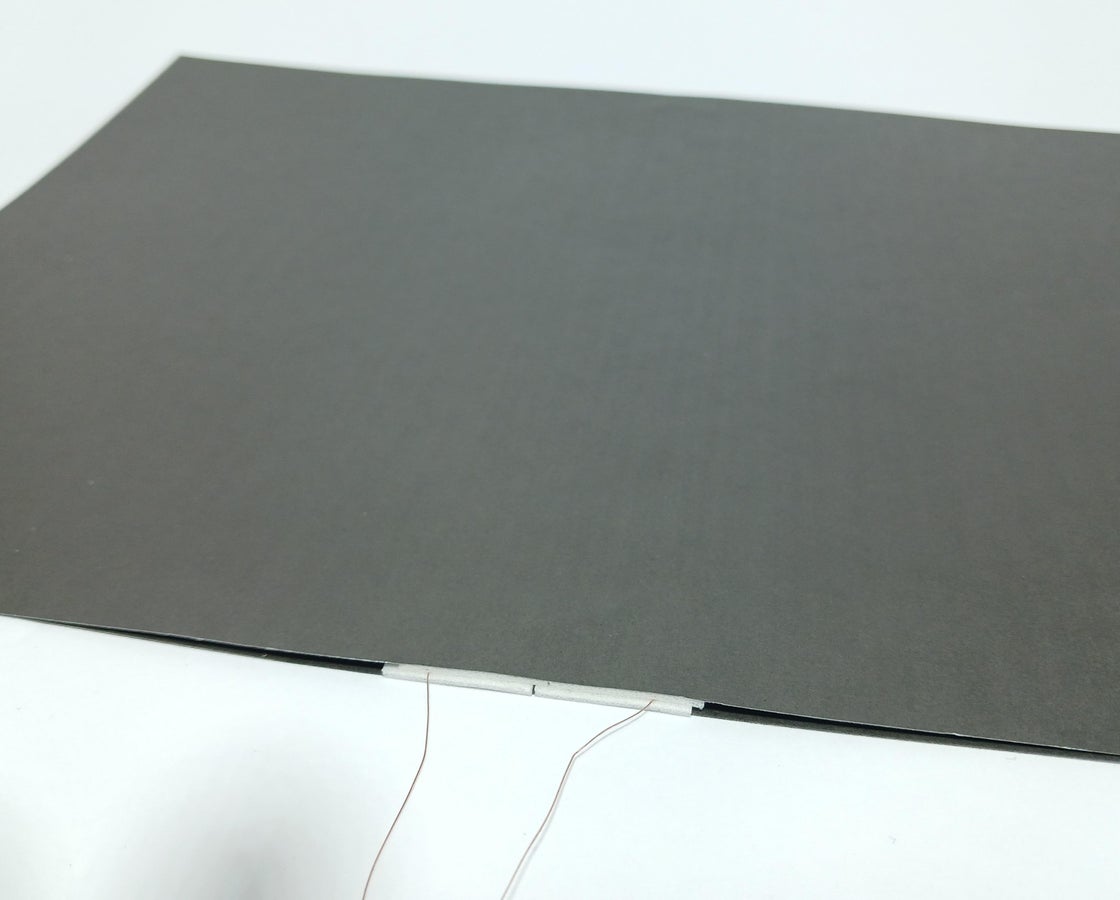
Step 7: The Motor Assembly:
As with the diaphragm the motor assembly will have a big impact on the final sound of your speaker especially its sensitivity, a lightweight diaphragm plus a strong motor gives a high sensitivity speaker.
For this step we will need:
- Ferrite or neodymium magnets (I used 14x 30mm long ferrite block magnets).
- CA glue plus activator
- Marker
- 2x wooden slat assemblies
Unfortunately to produce a strong motor we will either need very large ceramic ferrite magnets or rare earth neodymium magnets that can get get expensive quickly as you will need a lot of the smaller magnets stacked next to each other to get the right size.
As this project was just meant as a test run I went with readily available “craft” 20mmX30mm ceramic ferrite block magnets that I was able to buy in packs of 10 from the craft store for only $1 and to my surprise they are not too bad!..yes in my next iteration of the speaker I will definitely move to neodymiums as I now know the driver works but for a low cost build these are perfect.
Before building the motor you will want to stack all the magnets on top of each other and then mark the top of each magnet so we know the magnetic poles of the magnets as out of phase magnets can quickly ruin your build!
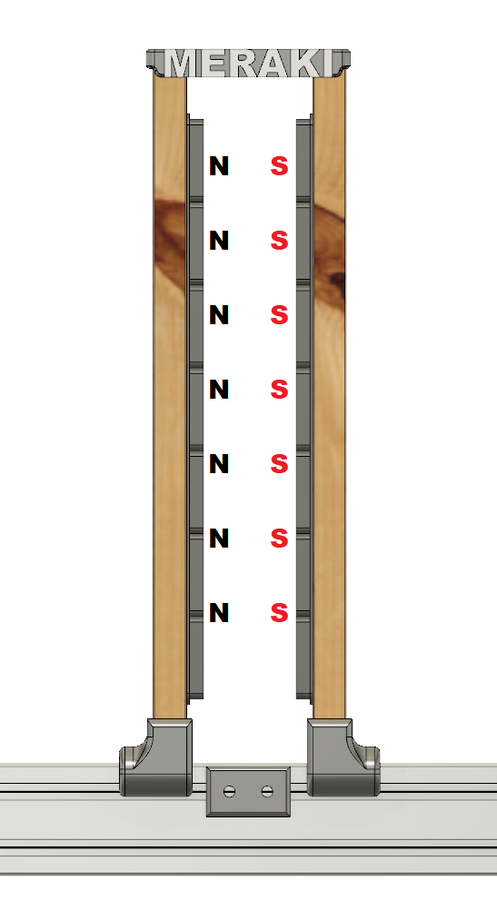
Using CA glue along with activator I placed a row of 7 magnets down the one side of two of the wooden slats as pictured, make sure one has the north pole facing up and the other has the south pole facing up.
To increase the magnetic field of your motor you can add a strip of iron behind the magnets.
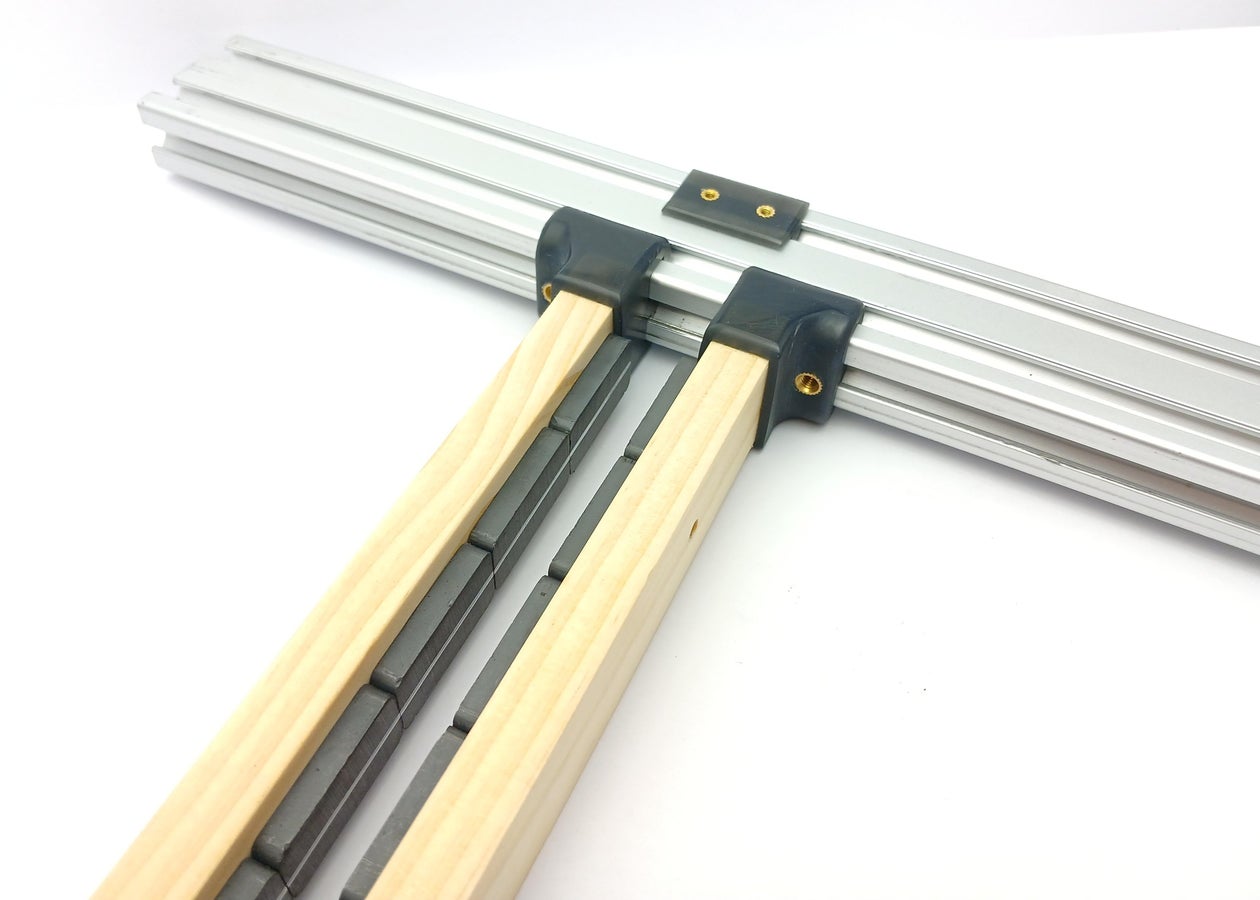
Once both parts of the motor is assembled you can slide the two wooden slats onto the 2040 aluminium profile with the magnets facing each other.
Step 8: Forming the Diaphragm:
We’ve reached the last step before we can start listening!
For this step we will need:
- Your magnet motor assembly.
- The completed diaphragm with voice coil.
- 2x wooden slat assemblies.
- 15mm Double sided mounting tape.
- 2x Printed caps.
- 2x Printed feet.
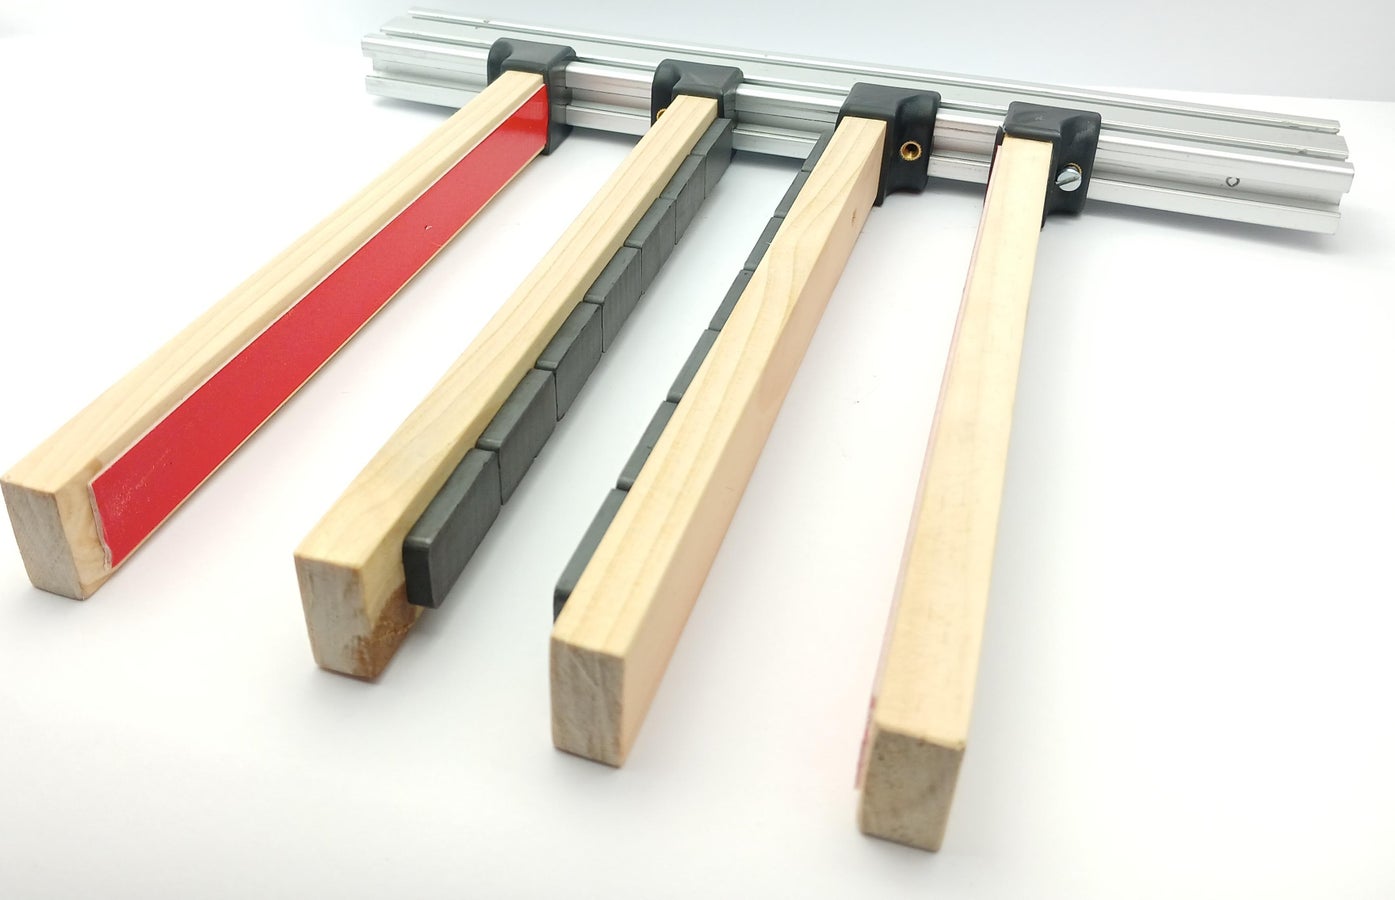
First we need to apply a strip of the 15mm mounting tape down the two wooden slat assemblies you have left as pictured above, we will use these strips to adhere the ends of the paper onto the slats.
You can then go ahead and slide the two slats onto each end of the 2040 aluminium profile with the mounting tape facing towards the magnets, once in place you can use some CA glue and adhere the two printed caps onto the top of these two wooden slats and you can also attach the feet on the ends of the 2040 extrusion.
Now to attach the diaphragm to the frame.
I actually ended up making a big mistake at this step the first time by sticking the wrong side of the paper onto the wooden slat which took some heat and a nerve wrecking long time to slowly pull the paper back off of the tape.
So unlike me…
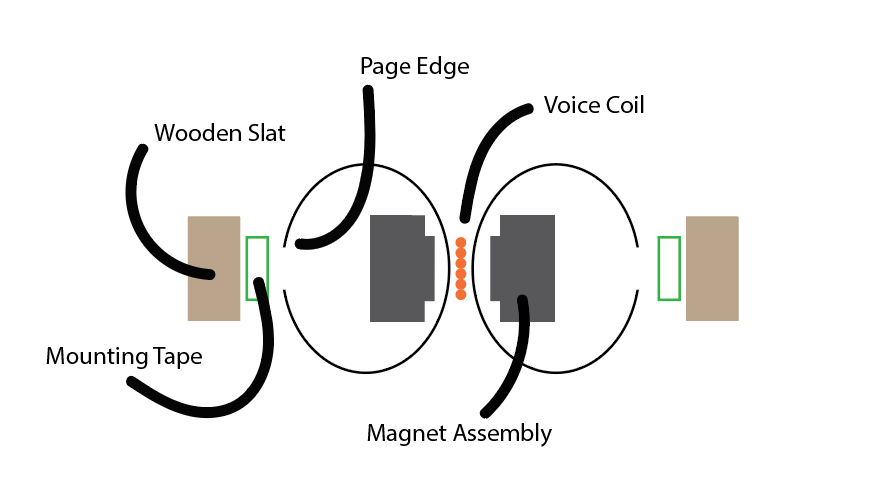
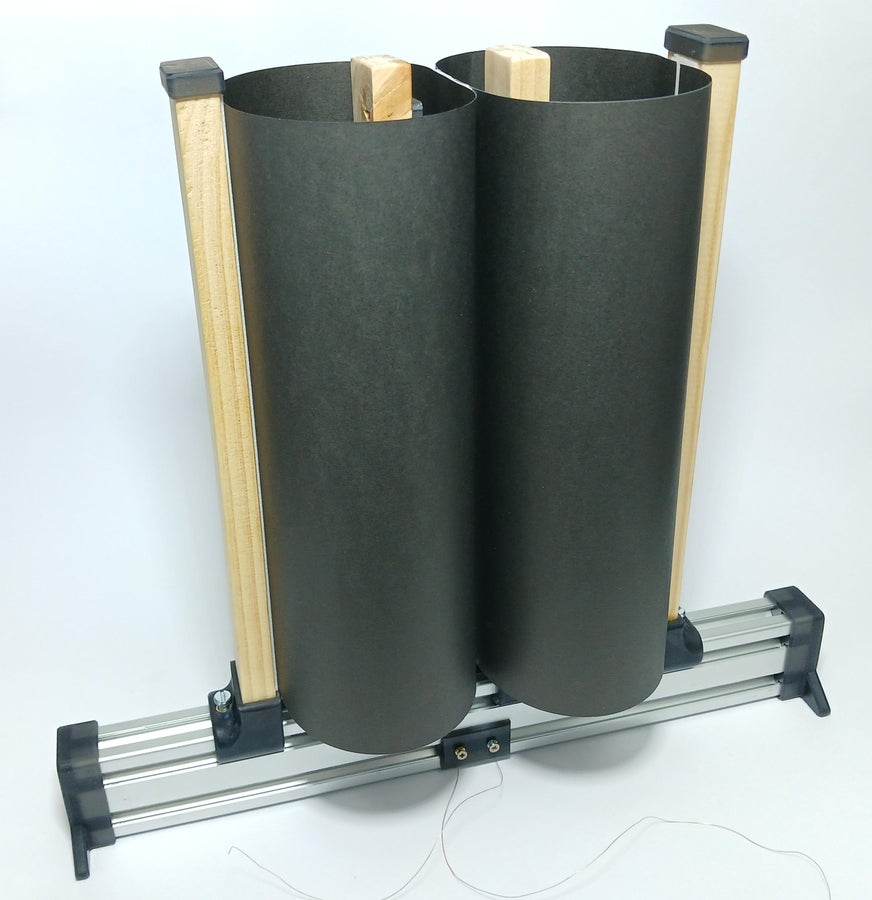
Start by removing the backing from the mounting tape, then place your diaphragm into the frame so that the voice coil sits in-between the two magnet assemblies with the voice coil two leads on the bottom.
Using the picture below as reference you now want to split the two pages apart, the left page bends open and the its edge gets stuck halfway to the left wooden slats mounting tape. Next we do the same to the right side page.
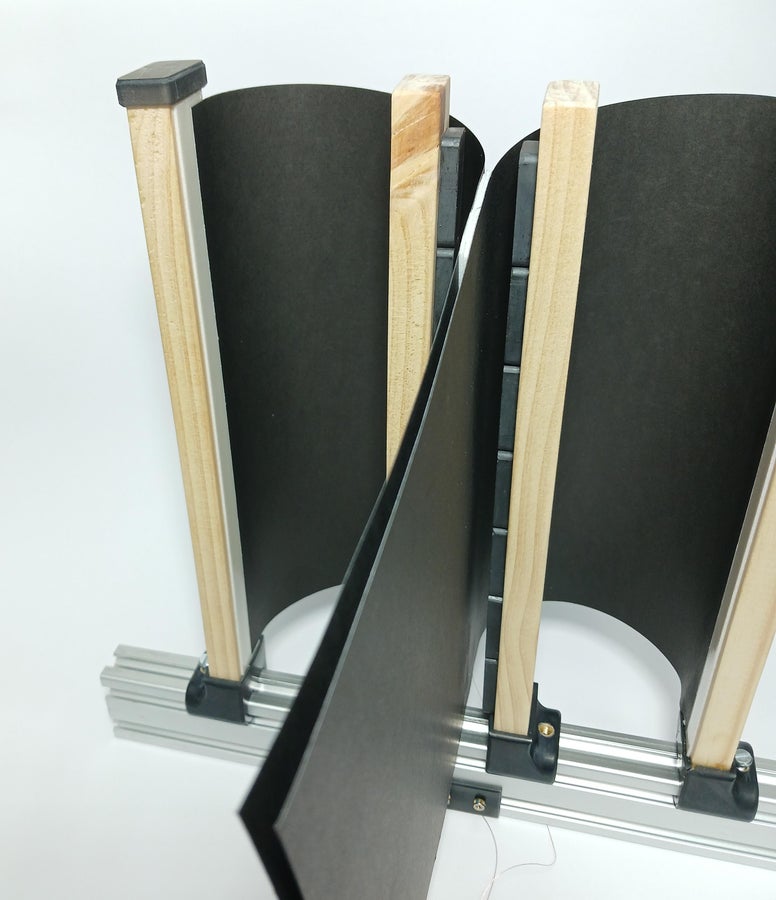
Now you can repeat this with the ends of the papers facing you.
You want it so that both pages form a cylinder that is attached in the middle by the voice coil.
Finally we just need to hook up the delicate voice coil leads.
Cut off the excess of the voice coil leads so that you are left with around 100mm, using fine sanding paper clean about 20mm of the ends of the leads. Because the threaded inserts on the terminal plate are brass you can solder the leads onto the inserts for a permanent connection or you can simply wrap the bare leads around screws that are them threaded into the inserts.
To test continuity you can touch a 1.5v AA/AAA battery on the terminals, this will produce a scratching sound and the diaphragm will move.
Step 9: Calibration:
To get the best possible sound out of your build will require some calibration.
For this step we will need:
- Printed “Top 1.stl”
- 4x M4 12mm screws
- 2x 3mm Self tapping screws
- 2x Washers for screws
- Amplifier for testing driver
- Frequency generator (Online Tone Generator)
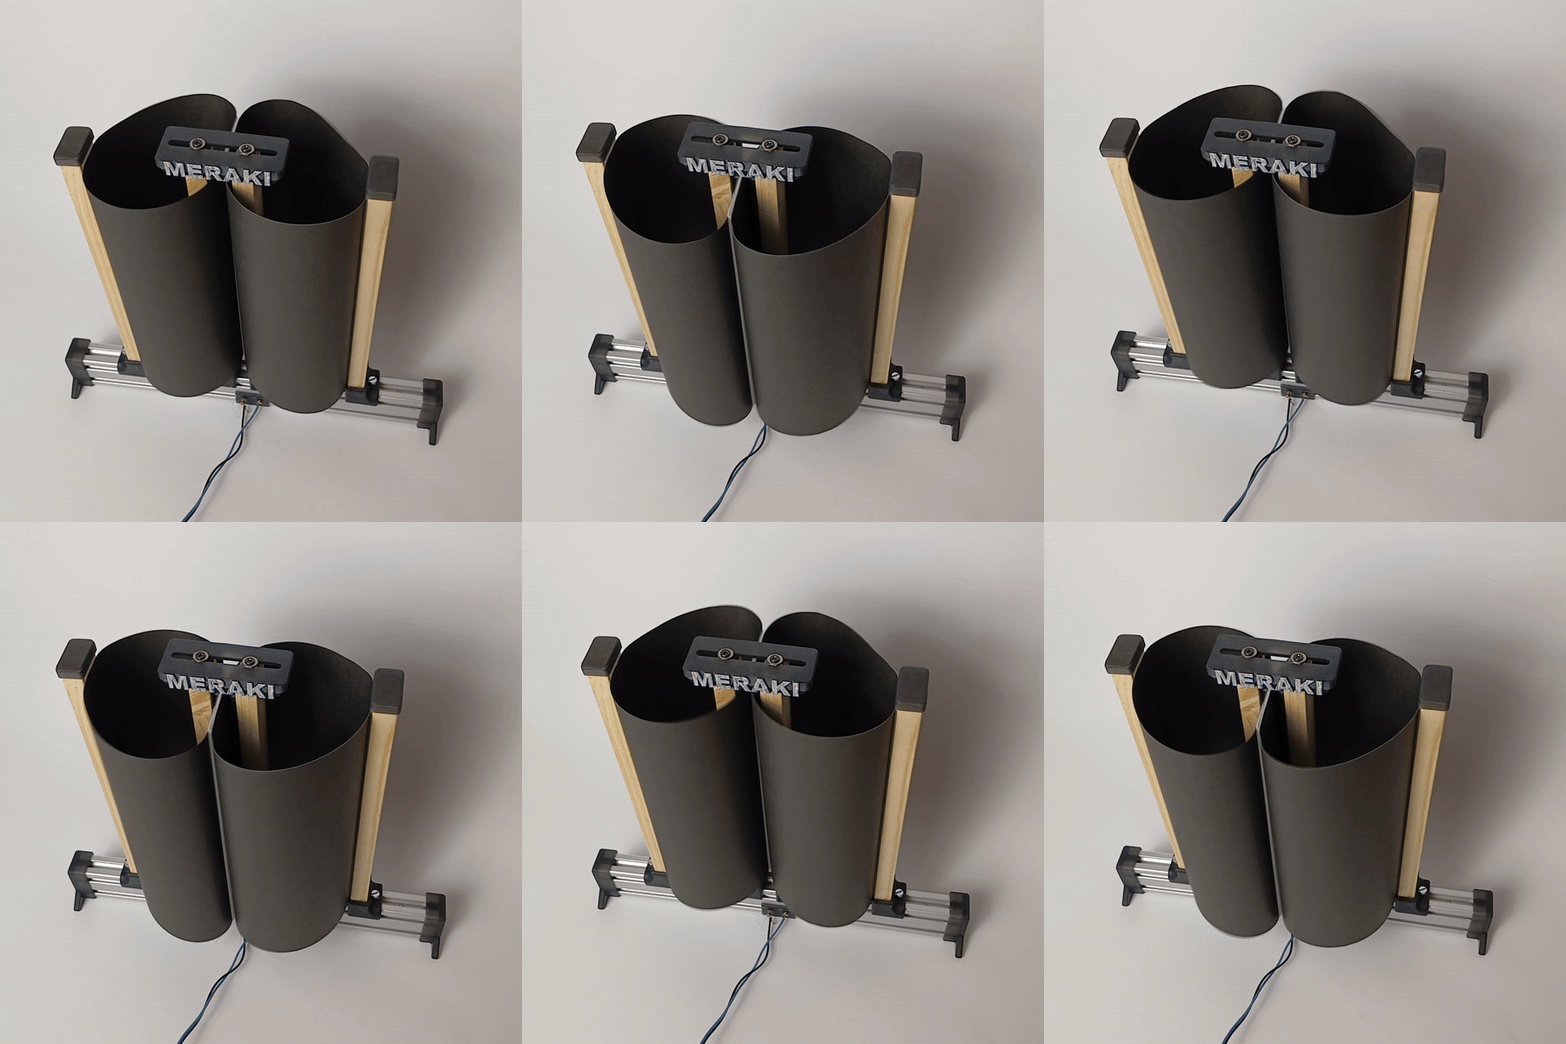
Driver being overdriven with 10hz frequency to demonstrate movement.
To calibrate your driver will require some experimentation, first we will need to adjust the magnet assemblies. I found mine worked best with about 2-3mm of space between each side of the magnets and the voice coil, to adjust you will slide the magnet assemblies back and forth on the 2040 extrusion until you get the desired distance on the bottom you can then add a M4 screw to each insert of the magnet assemblies and tighten them down.
The top of the magnet assemblies will attract each other and throw everything out of alignment, to remedy this we will add the printed “Top 1.stl” to the tops of the magnet assemblies using two 3mm self tapping screws.
Simply separate the top the same distance as the bottom and screw the top in place using the screws with washers added on top.
Adjusting the diaphragms:
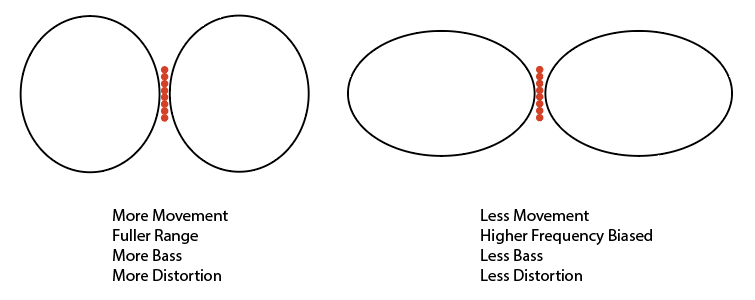
This might not be the most scientific method but I found the best way to adjust the diaphragm is to hook up the speaker and play a tone around 200-400hz at moderate volume and then simply make small adjustments to the wooden side slats until they sound the best.
The most important thing is to make sure you keep your voice coil cantered in the magnets.
Once you’ve found your drivers sweet spot simply fasten down the sides with the last two M4 screws.
Step 10: Test It Out!
I hope you guys find this Instructable useful and if you have any questions please feel free to leave me a message or comment bellow.

Thank you for taking the time to read through my project and as always..
Happy making!
![]()


